How to make Character Macarons using a Parchment Paper Tracer
Place a template parchment paper tracer underneath your Silpat mat or Clean parchment paper that you’re going to pipe your macarons onto. You can find templates on Pinterest and Google. To make character macarons print off a template or free hand your own template.
Once you have your template under you surface you’re going to pipe onto, gather all of your materials that you’ll need for your template:
Now you can start piping onto your template. Begin with the smaller and more delicate details first. For example – wheels on a car, ears, horns, hands, feet. Use a toothpick to pull the batter into a point or fine details like fingers/toes if needed.
After you’ve piped the small details, begin piping your larger details/base of your macaron. This could be a different color of macaron batter. It’s best to trace the outline of the template, then fill in the center with batter. This way you won’t make the macarons too big and overtake the template design.
Let your macarons dry completely – about 30 min.
Bake your macarons for the same amount of time in your recipe.
Let the shells cool to room temperature – about 20 min.
How to make Character Macarons by Layering Macaron batter
Character macarons can be made by layering macaron batter.
Place a parchment paper template underneath the surface you are going to pipe your macarons onto.
Gather your materials – macaron batter, toothpicks, etc.
Start creating the base of your macaron. Tract the lines and fill in the center. You could be using multiple colors for eyes, body, feet, etc.
Let your base dry for 15 minutes.
Add on your second layer of macaron batter – generally this is a different color. You can add a nose, eyes, mouth, hands, feet, etc. on top of your base color.
Let your second layer dry for 15-30 min until a skin forms on the macaron.
Bake for your required time according to your recipe.
Let cool at room temperature for ~ 20 min.
Add more decorations to your macarons – draw on eyes, face, mouth by using an edible marker, add buttercream icing decorations if desired.
As an Amazon Affiliate, I earn from qualifying purchases.
Silicone molds can be used to create dazzling desserts like an ice cream dome cake, chocolate cups, tuiles, mousse cake, hot chocolate bombs, and more!
Silicone isn’t the best for using in the oven, because silicone does not conduct heat like aluminum does.
It’s best to use silicone molds for desserts that require chilling, freezing, or shaping.
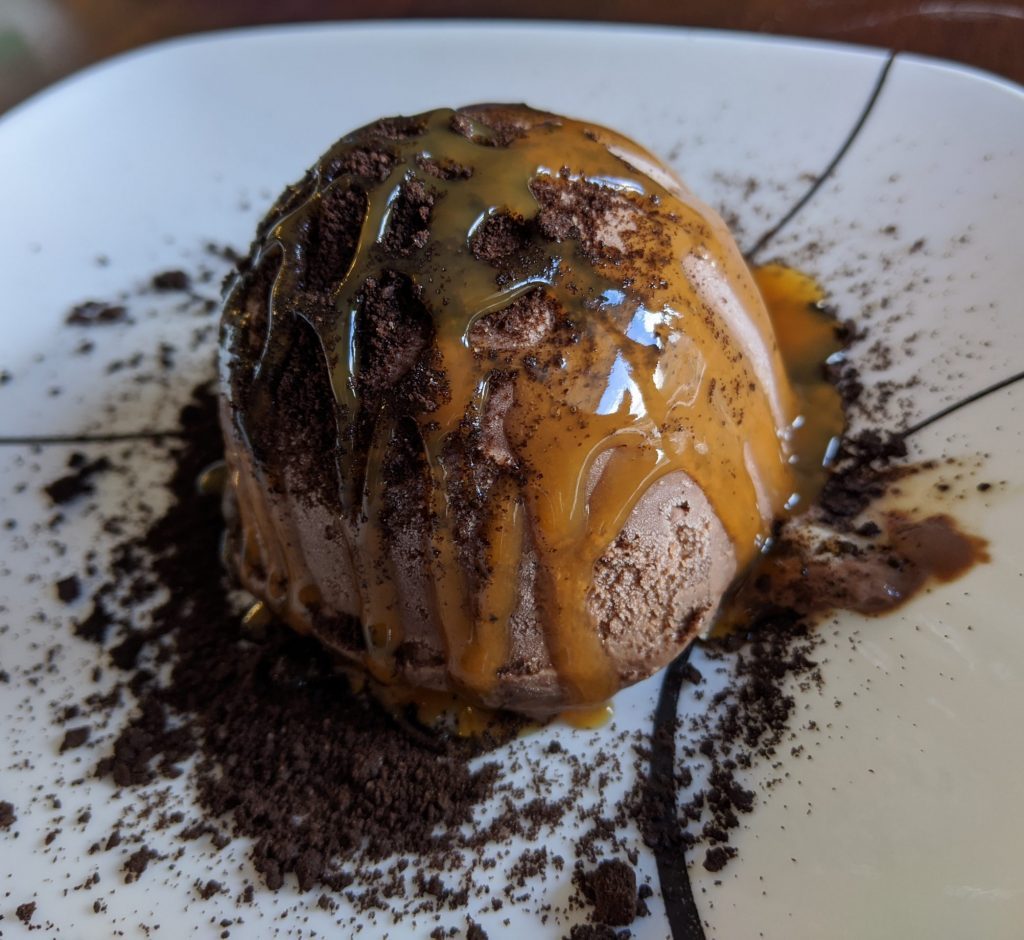
Ice Cream Dome Cake
An ice cream dome cake is made using 2 different ice creams that are layered on top of one another in the silicone mold.
The center filling is placed in the middle of the silicone mold.
The center filling is typically a sweet filling such as jam, ganache, chocolate sauce, caramel, fruit or sauce.
The silicone mold is frozen overnight, and then the mold is removed right before serving.
Toppings are sprinkled on top of the dessert to create a beautiful ice cream dome cake.
Chocolates
You can make your own fancy chocolates at home with homemade fillings using small silicone molds.
Temper your chocolate, or melt it in the microwave, and then fill your small silicone molds about 1/3 of the way fill, but make sure the chocolate goes all the way up the sides of the mold.
This will ensure the filling will be completely encased by chocolate. You can use a pastry brush to guide the chocolate up the sides of the silicone molds.
Place the silicone mold in the fridge for about 20 minutes to let it harden up.
Spoon a small amount of filling into each of the chocolates (caramel sauce, hazelnut sauce, etc.).
Melt your chocolate again if it’s hardened up, and then pour the chocolate over the silicone mold to completely encase the filling with chocolate.
Using a bench scraper, scrape the excess chocolate off of the molds, and then place the silicone mold in the fridge for another 20 minutes.
Mousse cake is a layered cake that uses silicone molds to make it into a sphere shape.
Mousse cake is made by using a mousse recipe that has been stabilized with gelatin.
Chilled mousse can be spooned into a half sphere silicone mold and guiding it up the sides of the mold.
Leave about 1/4″ thickness from the top of the mold, and a divot in the center for the filling.
Fill the divot of your silicone mold with a sweet center filling.
You could use dark chocolate ganache, raspberry jam, or chopped up fruit and place it in the center touching the mousse.
The bottom of the mousse cake can now be added to the silicone mold. This will be what fills the bottom of the mold, and the cake will stand up straight and have a flat bottom.
Use a metal cookie cutter or a glass to gently cut the cookie into pieces that will fit perfectly for your silicone mold. Try to get it as exact as possible or a little smaller.
Place the cookie on top of the mousse and center filling, and gently press it in so it will adhere to the mousse. It’s ok to have the mousse come around the edges.
Freeze the mousse cake for about 4 hours to let it set.
Remove the mousse cake from the freezer and gently peel back the silicone mold.
You can add a mirror glaze to the top of your mousse cake, or a simple syrup to make it shine.
You can dust the top with powdered sugar, cocoa powder, coconut flakes, or add a small amount of whip cream to the top to finish it off.
Shaped Tuiles
Tuiles are a thin crispy cookie. You can fill tuiles with sweet fillings such as mousse, chantilly cream, custard, and curd.
Tuiles are made by making a thin cookie batter, and then shaping it on a silicone baking mat with the back of the spoon. Tuiles are baked in the oven until the edges start to turn a golden brown.
Tuiles need to be shaped right after coming out of the oven, otherwise they solidify and you can’t mold them into a shape.
For this particular dessert, a rectangular shaped tuile was made, and then baked in the oven.
The rectangle cookie was gently placed inside a half sphere silicone mold, and then let to set and solidify.
You can pipe mousse or chantilly cream on the inside the tuile, and then place a macaron on in the middle of the tuile to create a beautiful dessert for your family and friends.
Chocolate Cups
Chocolate cups can be used to hold mousse, or ice cream to create a beautiful and decadent dessert.
Chocolate is melted in the microwave, and then a pastry brush is used to paint the chocolate onto the silicone mold.
The trick to making chocolate cups with silicone molds is making sure the sides of the cup are quite thick.
The thicker the sides, the less likely the sides will break.
Place the fully coated chocolate silicone mold in the freezer for 1 hour until it’s fully hardened.
To remove the chocolate cup from the silicone mold, pull the sides of the silicone mold until you have removed the edge of the chocolate all the way around the mold.
Once the bottom edge is completely separated, press the top of the mold to release the chocolate cup from the silicone mold.
To make the edges nice and perfect, melt the edge on a warm plate.
The gummy bears take 24 hours to fully solidify in the fridge.
Candies
Candies are sugar filled desserts that are quite hard and can be made into beautiful shapes using silicone molds.
You can make honey hard candies by combining sugar, water and lemon juice in a saucepan over medium high heat. As soon as it begins to boil, honey added and the temperature is turned down.
Candies are heated until they reach 295°F-310°F on a candy thermometer.
Candies are carefully poured over a silicone mold and then let to set over the next few hours as they cool down.
Peanut Butter Cups
Peanut butter cups are chocolates filled with creamy peanut butter in the center.
Chocolate is melted and then a pastry brush is used to paint the sides of a ribbed silicone mold.
The silicone mold is placed in the freezer for 1 hour until it has fully hardened.
A spoonful of peanut butter is placed in the center of the ribbed silicone mold.
Chocolate is melted and then poured overtop of the peanut butter to completely encase the peanut butter to create the peanut butter cup.
The peanut butter cup is placed in the freezer for 1 hour to solidify it.
Remove the peanut butter cup from the silicone mold by pressing the top of the mold to release the peanut butter cup from the silicone mold.
Hot Chocolate Bombs
Hot chocolate bombs are made by using half sphere silicone molds that have a flat finished edge to them.
Chocolate is melted in the microwave, and then a pastry brush is used to paint the chocolate up the sides of the silicone mold.
The chocolate coated silicone molds are placed in the freezer for about an hour to harden up.
Gently pull the silicone mold away from the chocolate on the edges. Go around the whole circle gently removing the edges of the chocolate from the silicone mold.
Place the semi-circle chocolates on a warm plate to melt the edges of the chocolate. This will be to seal the hot chocolate bomb later.
Fill one half of the semi-circle with 1 tbsp of cocoa powder, sprinkles, and marshmallows.
Hold the filled semi-circle in one hand. Put the other semi-circle on top and gently press the 2 together to create a seal.
You can decorate your hot chocolate bomb using white chocolate, gold dust, or sprinkles.
Caramels
Caramels have a sweet burnt sugar flavoring that you can make into small candies using silicone molds.
Caramels are made by heating together sugar, honey, and vanilla until it becomes a golden brown color.
Butter is slowly added to the saucepan and whisked into the caramel.
In another saucepan, heavy cream is heated until it begins to simmer.
Heated heavy cream is slowly poured into the caramel along with a pinch of salt.
Caramel is heated until it reaches 260°F.
Caramels are poured into small silicone molds, and then they will set on their own over the next couple of hours.
Place flour, baking powder/baking soda, salt, sugar into your recipe. Mix well.
Add butter/shortening.
Cut the butter using your pastry blender. When you cut the butter move your wrist to make a ¼ turn at the end to mix it into your flour.
Cut your butter with your pastry blender until the butter looks about ½ cm pieces aka coarse crumbs. The butter will all be covered in your flour mixture.
what coarse crumbs looks like after using a pastry blender
How do you cut butter in a recipe?
Make sure your butter is cold, right out of the refrigerator.
Cut your butter into your flour mixture by pressing your pastry blender into the butter, cutting right through to the bottom of the butter. If it’s too hard, just try cutting smaller pieces off of the top until it’s a bit easier to work with.
Once it’s a bit more worked in, cut your pastry blender into your flour with a ¼ turn at the end to completely mix it into your flour mixture.
Cut all of the butter with your pastry blender until your butter is in small pieces ~½ cm.
How do you clean a pastry blender?
Rinse the pastry blender with a bit of water, or soak in some soap and water. Once the majority of your butter/flour is off of the pastry blender, place it on the top rack of your dishwasher to fully clean it.
Is a pastry blender necessary?
Yes. Using a pastry blender is one of the hand tools recommended for making pastry. Making pastry is already difficult enough, especially without the right tools.
As an Amazon Affiliate, I earn from qualifying purchases.
How can Basil be used in cooking?
Basil can be used at the end of the cooking process. It will wilt and the flavor deteriorates as it gets heated; therefore, adding it at the end will give your dish the most flavor possible.
How to Cook Basil Leaves?
It depends what you’re making. If you’re including it in a pasta dish, you can cut it into strips, then add them in at the end. When you’re making pesto and Vietnamese wraps, use the whole leaf.
Can you eat a basil leaf raw?
Yes. Basil can be consumed raw on appetizers like crostinis and bruschetta.
Yes. Just like all produce you bring home from the grocery store, you should wash it thoroughly and dry before using.
What is Basil best used for?
Basil is best used for making pesto, pizza sauce, and margherita pizza.
What does Basil go with?
Basil goes best with tomatoes, olive oil, mozzarella cheese. Frequently it’s used in Italian cooking which will give you a good clue as to what it goes well with.
As an Amazon Affiliate, I earn from qualifying purchases.
Types of Parsley
Curly leaf Parsley: garnish
Flat leaf/Italian Parsley: strong flavor
Root Parsley: vegetable addition to soup, stew or eaten as is.
How to Grow Parsley from Cuttings?
Cut a stem of Parsley approximately 3 inches tall that has leaves attached to it.
Put it in water in a window sill that gets a lot of sun.
Once the roots have grown after a couple of weeks, place into well drained soil and continue growing.
How to Grow Parsley Outdoors?
If you have a new plant from a nursery you have a couple of options- if it’s still cold outside at night, start growing inside on a sunny windowsill. Place outside after the last frost.
Parsley likes it’s soil damp, be sure to continue watering throughout the summer
Plant seeds 6-8 inches apart so they aren’t too crowded.
Plant seeds outside covering them only by 1 cm of soil. Give them a bit of room to grow, not too much is needed.
Parsley Growing Conditions
Wet soil
A bit of sunlight
Try to not clutter the plant – thin it out so it will continue to grow
How do you cut parsley to encourage growth?
Cut clippings from the outside to encourage new growth in the middle of the plant
Cut any flowers that begin forming to extend the life of your herb
How to Preserve Parsley in Fridge?
Place stems of freshly cut Parsley into a glass of water
Store the glass full of Parsley in the fridge to extend the life and flavor of the herb
Change the water as needed
How to Eat Parsley?
Use the leaves only when eating Parsley. The stems are very bitter and won’t have that sweeter flavor the leaves do.
Have too much Parsley, and you’re not sure what to do?
Dry your Parsley so you can use it all year round.
How to dry Parsley?
Cut stems of Parsley from the outer edge of the plant
Tie the stems together
Place Parsley in a paper bag
Poke a couple of holes in the bag to aerate them.
Store the bag in a cool, dry area for a couple of weeks.
After 2 weeks, take your Parsley and grind them up with your fingers. You should have a nice medium grind – perfect for adding to dishes
Store in an airtight container for ~ 1 year.
By using the paper bag method, you’ll keep the strong green color and flavor as much as possible.
Parsley is a light, fresh herb that adds character to dishes like eggs, meat, dips and potatoes. Try growing it for yourself next summer and see how you like cooking with your freshly grown herb.
As an Amazon Affiliate, I earn from qualifying purchases.
Oregano can be used in cooking to add a bitter, earthy, pungent flavor. Oregano can be used to balance out other strong flavors like onions, garlic, thyme, and lemon.
How to use Oregano Leaves
Fresh leaves can be used in place of dried Oregano. Fresh Oregano is stronger than dried Oregano, so taste test before adding too much
Dried leaves need to be crumpled in your fingers first, then added to your dish
What is Oregano Good for in Cooking
Oregano is best known for being used throughout many mediterranean dishes including Greek salad, pizza sauce, and pasta sauce
marinades/rubs for chicken, beef and fish
Including in roasted potatoes, carrots, butternut squash, red onions
Add to pizza dough for extra flavor
Topping for breadsticks
Oregano pesto
Greek Salad
Infused oil for dipping sauce or focaccia bread
Herbed butter
Brown butter sauce addition
Olive oil pasta addition
Stuffing
How do you Preserve Fresh Oregano Leaves
Freeze oregano leaves right before the plant flowers. These will be the most flavorful plant leaves.
Store frozen leaves in an airtight container.
Thaw leaves for 10 min before using.
Crumple leaves in your fingers, then add them to your dish to ignite the flavor.
How to Dry Fresh Oregano
Clip oregano stocks right before it flowers
Tie stocks together at the bottom
Hang Oregano upside down
Let dry for 3 days in the sun/or ~7 days inside (place a paper bag underneath so it will gather any droppings if you’re drying Oregano inside.
After Oregano is finished drying, get a bowl to harvest your Oregano in.
Place the bowl outside so you don’t get a mess everywhere inside.
Run your fingers down the stock gathering the leaves into the bowl.
Multiple stocks can be done at a time.
If you want a finer Oregano – use your fingers to grind the Oregano up into a smaller herb.
Store in an airtight container.
How to Grow Oregano Indoors
Plant seeds/new plant from a nursery in fresh soil and place in a container that is able to drain out the bottom
Place in a window that gets a lot of sun
Water only when the soil feels dry
Water until it starts draining out the bottom of the container
Grow the plant at least 4 inches tall before trimming the plant
Continue to clip the plant periodically to encourage new growth
Perennial – self seeding plant
Drought tolerant
Oregano Plant Types
Mild Oregano – Golden
Strong, pungent Oregano – Greek
Spicy Oregano – Syrian
Common Oregano – marjoram hybrid- Italian
Common Oregano
Marjoram is from the Oregano family. Marjoram is commonly used in Northern Italy instead of Oregano. It’s a bit sweeter, lighter flavor than common Oregano. It’s not as harsh or bitter as common Oregano. It’s usually only used at the end of cooking, because cooking Marjoram can kill off the flavor of the herb. Oregano is much more heat resistant. You can use Oregano early on in the cooking process without losing it’s pungent, bitter flavor.
As an Amazon Affiliate, I earn from qualifying purchases.
Making ice cream at home without needing an ice cream maker is possible by using ice and salt together.
Is salt really necessary to make ice cream?
Yes. Salt lowers the freezing temperature of water. So your ice with salt together end up being colder than frozen ice cubes. This makes the ice cream freeze much faster than if you were just using ice cubes without the salt.
To make instant ice cream you’ll need to gather a few items:
4 trays of crushed ice cubes – approximately 1 Litre of ice cubes
90 mL coarse salt
1-3 L Ziplock bag
1-975 mL Ziplock bag
Instant Ice Cream
125 mL heavy cream
30 mL sugar
2 mL vanilla extract
50 mL fruit (chopped frozen fruit)
In a 3 L Ziplock bag, place both the salt and ice together.
In a 975 mL bag, place heavy cream, sugar, vanilla, and frozen fruit and seal completely.
Place the small bag inside the big bag.
Massage the bags together for 5-10 min. Wear oven mitts to prevent your hands from getting too cold.
Serve immediately. Recipe has enough ice cream for up to 2 people.
As an Amazon Affiliate, I earn from qualifying purchases.
Dessert croissants can be made by using vanilla custard, chocolate, almond paste, and cream cheese with jam to create a sweet stuffed croissant.
You can stuff croissants right before baking, or after you’ve baked the croissants.
There is no need to make your own croissant dough until you’re ready to take on that task. Purchase croissant dough in the freezer aisle and thaw it out until it’s ready to be worked with.
It’s best to use freshly baked croissants that are flakey, buttery, and melt in your mouth.
Making croissants is quite the process! It’s about 3 days to make the croissant dough, but it’s worth all of the effort! You can also use store bought croissant dough if you want to.
The vanilla custard needs to be chilled prior to using, therefore it’s ideal to make the custard the day before you need to fill the croissants.
Once the croissants have been baked and cooled to room temperature, you’re ready to fill them with your custard using a piping bag fitted with a medium sized round tip.
Each side of the croissant needs to be filled with custard, so you can see 2 entry points to fill the croissants.
Press the piping tip as far into the croissant as possible, and begin piping the custard. The croissant will fill up, and then remove the piping tip from the croissant.
Repeat on the other side of the croissant.
Store vanilla custard stuffed croissants in the fridge, until you’re ready to serve them for dessert.
Chocolate Croissants
Chocolate croissants are made with rectangular cut croissant dough.
You can use semi-sweet chocolate for a more sweet flavor, or bittersweet chocolate if you don’t want a ton of sweetness for your stuffed chocolate dessert croissant.
Do not overfill the croissant with chocolate, or it will end up melted all over your pan.
You can use chocolate chips, or a bar of chocolate. The chocolate should be about 1 cm in diameter, and then should run the length of the croissant dough.
Cut the croissant dough into 2″ x 5″ sections to make chocolate croissants. Stretch the dough with your hands, and then arrange the chocolate on the short end of the croissant dough.
Begin rolling the dough, and end with the seam edge down.
Make an egg wash with 1 egg + 1 tsp water. Whisk together, and then brush the egg onto the croissants.
Let the dough proof on the counter for 2 hours.
Bake the croissants at 410 degrees for 7 min, then bake at 375 for 13 min. Or, follow the directions on the package if you’re making croissants with store bought dough.
Almond Stuffed Croissants
Almond stuffed croissants are made by using day old croissants. The croissants are cut in half, and then they are dipped in a sugar syrup on each side.
The croissants are stuffed with an almond paste made of almond flour, butter, sugar, salt, and eggs.
On the top of the croissant, the almond paste is spread with a knife, and then sliced almonds are sprinkled on top.
Almond croissants are baked in the oven, and can be served for dessert warm, right out of the oven.
As an Amazon Affiliate, I earn from qualifying purchases.
Olive oil is one of the most commonly used oils for eating. It is the foundation of my different recipes. Extra virgin olive oil is best used for salads and pesto. If you want to be tasting olive oil, use extra virgin olive oil. If you don’t care about the flavor, you can use regular olive oil for cooking vegetables/meat, etc.
Use a small plate and pour 3-4 tbsp of olive oil on it. Add a bit of balsamic reduction on top of the oil. It should be about 1/3 balsamic reduction to olive oil ratio. Dip focaccia bread into the olive oil and balsamic reduction. Toast the bread just a bit before serving.
What type of breads are best for dipping in olive oil?
Focaccia bread
French bread
Baguette
Ciabatta
How to use olive oil for salad dressings?
Making salad dressing is simple to do when using extra virgin olive oil as your base.
Always air on the side of caution when adding vinegar to your salad dressing. Add it sparingly, otherwise it will be too powerful and will not taste sweet. It will be a more bitter, harsh flavor
Olive oil to Vinegar ratio is 3:1
Use red wine vinegar, white wine vinegar, or balsamic vinegar as your vinegar for your dressing
Add a few drops of lemon juice if desired
Pinch salt and pepper to taste
Other possible additions and combinations to try out: Dijon mustard, minced garlic, honey
What else can you make with olive oil?
Focaccia bread is made with infusing herbs into olive oil over heat. The smell of the infused oil will fill your kitchen. A small portion of the olive oil is then used within the bread dough. After the dough is done rising, the oil is used to oil the pan. The dough is then placed into the pan, dimpled with your fingers. After, the rest of the herb infused olive oil is placed on top of the dough. The oil will cover the dough completely, then it will bake and infuse into the dough. The dough will come out dry, with no remaining oil on top. The oil gives focaccia bread a moist, fresh, light bread texture that is perfect for dipping into more olive oil and balsamic reduction.
How to make focaccia bread with olive oil infused with herbs at home in only 2 hours.
Prep Time25 minutesmins
Active Time20 minutesmins
Rising Time1 hourhr20 minutesmins
Total Time2 hourshrs5 minutesmins
Course: Appetizer, Side Dish, Snack
Keyword: bread, focaccia bread
Yield: 10slices
Equipment
Oven
Saucepan
13" x 9" Pan
Materials
1/2cupolive oilextra virgin
2garlic clovesminced
1tspthymedried
1tsprosemarydried
1/4tspblack pepper
1cupwarm water(100-110 degrees F)
2 1/4tspinstant yeast
1/4tsphoney
2 1/2cupsflour
1/2tspsalt
pinchfinishing saltoptional
Instructions
In a small saucepan on low heat combine olive oil, garlic, thyme, rosemary and pepper. Cook for 5-10 min until fragrant stirring occasionally.
In a large glass bowl combine warm water, yeast, and honey. Let sit for 5 min until frothy.
Add the flour, salt and ¼ cup of the herb olive oil to the yeast mixture. Mix only until just combined and knead only 10-15 times. Don’t overwork the dough.
Cover the bowl with a towel and let sit for 1 hour to rise.
Preheat oven to 450 degrees F.
Pour 2 tbsp of the herbed oil into a 9×13’’ pan. Use a paper towel to spread the oil to the entire bottom of the pan, and into the corners. Transfer the risen dough to the baking pan and use your fingers to dimple the dough all over. Pour the remaining oil over the dough. Spread the oil all over using the back of a spoon.
Let rise for 20 min.
Add a sprinkle of finishing salt if desired.
Bake focaccia bread for 15-20 min. Let cool on a wire rack. Serve immediately or store in an airtight container. Place the container in the fridge to make it last longer. Best served the day of or use within 2 days.
As an Amazon Affiliate, I earn from qualifying purchases.
Coconut ice cream is just about as rich and creamy as regular ice cream. Usually regular ice cream is made by tempering egg yolks, heavy cream and half and half.
Coconut milk ice cream doesn’t require any of that. It’s just as tasty and rich, with much less work.
When making coconut milk ice cream, you can pretty much add any extra flavoring you like:
lavender buds (cooking with coconut milk, then strain afterwards. Add food coloring if desired)
earl grey tea (steep for 3-4 min)
rose petals (cooking with coconut milk, then strain afterwards. Add food coloring if desired)
basil (cooking with coconut milk, then blend in a food processor afterwards. Add food coloring if desired)
espresso (add coffee into the coconut cream mixture when heating + 1 1/2 tsp vanilla extra when cooling to room temperature)
vanilla (add vanilla extract into the coconut cream mixture when it’s cooling at room temperature, before refrigerating)
raspberry/blackberry (add berries at the end, when the ice cream mixture is churning in the ice cream maker, or blend berries with coconut cream in a food processor)
chocolate (add 1/4 cup cocoa powder per 1 coconut milk can + 1/4 cup sugar/honey + 1 tsp vanilla extract)
caramel (add caramel when it’s churning to marble the caramel throughout the ice cream)
mint chocolate chip (2 tsp peppermint extract + 1/2 cup honey + 1 tsp vanilla extract [when cooling], add 3 ounces of shaved [use a potato peeler] dark chocolate when it’s churning the ice cream)
Does coconut milk taste coconuty
When you’re adding flavors to it – no. The flavor you’re adding to it will overpower the coconut taste. If you’re not adding any flavors, yes it will taste like coconut. But it’s a fairly neutral flavor that will not be too strong of a flavor
Is coconut milk ice cream dairy free
yes and it’s vegan!
What type of coconut milk should I use for ice cream
Use full fat coconut milk so it’s rich and creamy texture and smoothness comes through
What types of sweetener can you use with coconut milk ice cream
honey
sugar
maple syrup
How to make coconut ice cream
Freeze ice cream bowl for minimum 24 hours
Measure out your coconut milk (usually 1 or 2 cans) and add it to your medium saucepan over low-medium heat.
Add sugar/sweetner to your coconut milk.
Add tea/lavender/herbs/coffee to mixture. Cook on medium heat until mixture coats the back of a spoon (8-10 min).
Remove from heat. Add extracts once your mixture has started to cool down.
Add berries and puree with food processor (be careful not to keep it closed in due to the steam).
Chill the mixture for minimum 6 hours.
Churn the mixture in your ice cream maker for 15-20 min. (Add berries/caramel towards the end of the churning process)
Freeze mixture for 3-12 hours before serving in an airtight container.
Thaw for 10 min at room temperature before serving.
Vegan Coconut Milk Espresso Ice Cream
We use cookies to ensure that we give you the best experience on our website. If you continue to use this site we will assume that you are happy with it.