The dough is scored around the rectangle shape to make it have an edging around the dough.
This creates the sides of the tart that keep the apples in place as it cooks.
Egg is brushed onto the tart to have a barrier in between the apple mixture and the pastry. The edges of the tart will have a sheen to them when brushed with egg, making it have a professional look to it.
Sliced apples are mixed together with a combination of brown sugar, cinnamon, melted butter, and lemon juice.
The apples are arranged to lay on their side, giving the tart a uniform look to it.
The tart is baked in the oven and then it set to cool.
Once the tart has cooled, a vanilla frosting is drizzled over the tart prior to serving.
Apple Strudel
Apple strudel is made by combining sliced apples, lemon juice, vanilla, brown sugar, cinnamon, flour and raisins into a sauce.
Roll out the puff pastry into a sheet. It should be about 1/3 cm in thickness. Place the dough on a cutting board.
Place the apple mixture down the middle of the puff pastry. Cut the edges of the dough into strips.
Arrange the strips to criss cross over one another. Seal the dough onto itself with a little bit of water.
Brush the apple strudel puff pastry with egg to give it a buttery look to it once it bakes.
Bake the puff pastry apple strudel and let it cool.
Once the apple strudel is cooled, you can add a drizzle of vanilla glaze if desired.
Enjoying a picnic on a hot summer day near the lake is a lovely way to spend an afternoon. You can pick sun friendly desserts so you don’t have to worry about brining an ice pack for your dessert.
You can serve many different picnic friendly desserts such as macarons, brownies, turnovers, donuts, loaves, tarts, cookies or Danishes.
Macarons
Macarons are chewy and melt in your mouth cookies. Macarons can be stored for 24 hours at room temperature.
Macaron cookies typically are filled with buttercream, jam, ganache, custard, or curd.
Macarons can be filled with fruit flavors, dessert flavors, tea and coffee flavors for a lovely afternoon picnic.
Donuts
Donuts are airy and have a delicate, texture that crumbles apart when you bite into them.
Donuts are a easy dessert you can bring to your afternoon picnic, without having to worry about them melting in the sun.
Vanilla Danishes have a buttery puff pastry dough, with a creamy vanilla bean custard in the center.
Vanilla Danishes can be kept at room temperature for several hours.
They’re a specialty dessert that you can bring to your next picnic for a lovely vanilla flavored dessert.
Brownies
Brownies are full of chocolate, and chewy goodness.
You can cut brownies into squares so they are individually portioned for your picnic.
Brownies are always kept at room temperature, and only need to be placed in an airtight container so they don’t dry out.
Vanilla Bean Sugar Cookies
Vanilla bean sugar cookies are soft, chewy, and melt in your mouth. Sugar cookies are a favorite dessert for many, and can be easily placed on a plate for serving at a picnic.
You can also ice the sugar cookies with some vanilla bean buttercream for an added sweetened flavor for the sugar cookies.
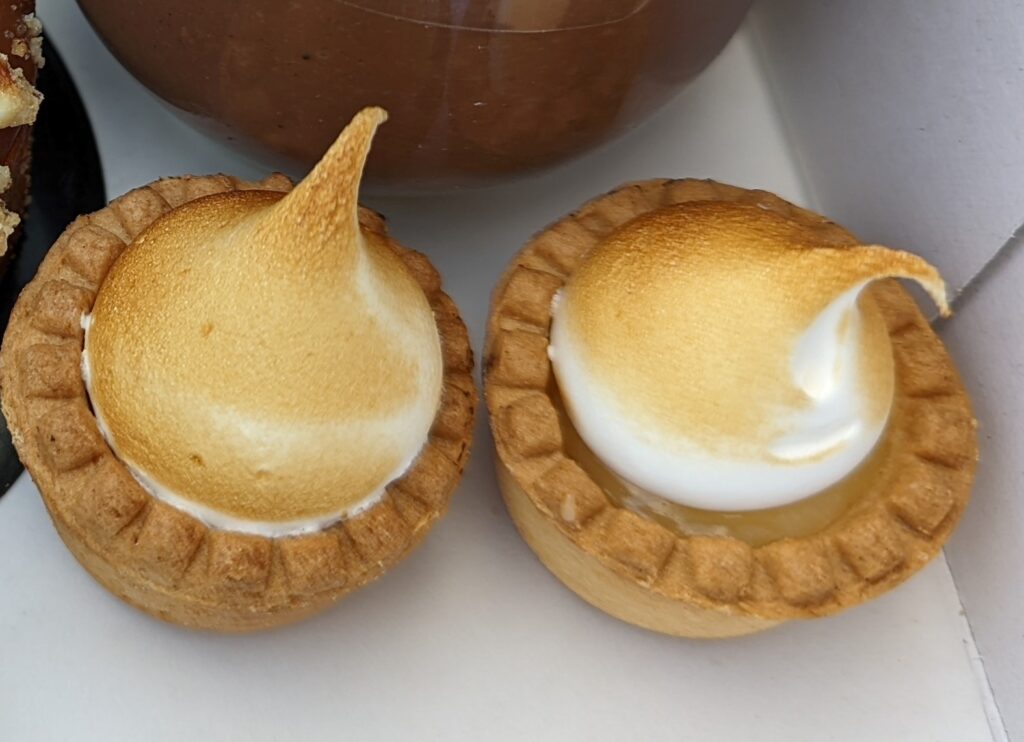
Tarts
You can serve mini tarts, or tartlets for your picnic so that they are bite sized, or small enough to be eaten in a couple of bites.
Tarts have a buttery crust that melt in your mouth, and are filled with lemon cream, chocolate ganache, pumpkin, and more for a sweet dessert for your picnic.
Shortbread is a buttery cookie that melts in your mouth. You can flavor shortbread with a variety of spices and herbs, or glaze the shortbread with a flavored icing.
It’s best to use silicone molds that are about 3″ in diameter to make individual dome cakes for your guests.
You’ll need to freeze the silicone mold in between ice cream layers so that it hardens, and doesn’t melt too much to have the layers mix with one another.
Give yourself a couple of hours to make your ice cream dome cake dessert, and then it should be frozen overnight to serve the following day.
Be sure to make your ice cream dome cake recipe at least a day in advance to have the ice cream freeze well before serving.
Center filling – jam, chocolate ganache, fruit sauce, caramel sauce
1-3 toppings for the ice cream (cookie crumble, caramel sauce, cocoa powder, sprinkles, fruit sauce, finely chopped fruit – kiwi, strawberries)
First you’ll want to pick your ice cream flavors that will go well together. Then pick your center filling that will go well with your ice cream flavors.
You’re ready to start making your dome recipe with your outer ice cream layer.
Your outer layer will be the one that will have your toppings on it.
Place your ice cream in the silicone mold.
Use a metal spoon to press the ice cream around so that all of the sides are covered in ice cream. Try to make it a 1/2 cm in thickness.
Place each silicone mold in the freezer in an airtight container as you complete them. They will start to melt very quickly and it will be messy.
Freeze for 30 min – 1 hour. Then you’re ready for your next layer.
Select your inner layer of ice cream.
Use a fresh metal spoon to put the ice cream in the molds.
Press the ice cream into the first layer so it’s completely covered. The thickness isn’t as important for this one, just make sure you leave a bit of space for the center flavor.
Freeze for 30 min – 1 hour. Now you’re ready for your final layer. Use a melon baller or a fresh spoon to scoop your center filling (ganache, jam, fruit, etc.).
Press your final layer into your silicone mold. It doesn’t have to be flat by any means, just make sure it’s filled and pressed into your second layer.
Use your fingers on either side of the silicone mold to peel the outer silicone mold off of the ice cream, with your thumb on the top of the mold pushing the ice cream out.
Try to take them out and place them directly onto your serving plate.
Once you have all of your desserts on their serving plates, you can sprinkle your toppings onto the ice cream dome cake.
Use 1-2 toppings for your layered ice cream dessert.
You can use sprinkles, caramel sauce, fruit sauce, or chocolate sauce to drizzle overtop of your beautiful ice cream dome cake.
Cookies are dipped into a deep bowl of chocolate and then placed on a silicone mold to harden. They can be placed in the fridge for 10 minutes to firm up.
You can decorate chocolate covered cookies with writing in white chocolate to commemorate a loved one.
Preparing sandwiches for funeral reception should be done in the morning of the day of the funeral, so that they can stay as fresh as possible. The bread will become soggy if sandwiches are prepared the day before.
You can pick 3-4 different types of sandwiches so you’ll have a variety for guests to choose from.
It’s best to prepare 1 sandwich per person attending.
Each sandwich you prepare can be cut into 4 triangles, 3 rectangles, or 2 circles so they are individually portioned and small in size.
Therefore, guests can pick and choose a few different types of sandwiches to enjoy.
Sandwiches can be prepared on sour dough, French bread, croissants, pumpernickel, multigrain, whole wheat, rye, or white bread.
ham and cheese
cucumber and cream cheese
roast beef and horseradish
veggie
egg salad
chicken salad
smoked salmon
Fruit
Fruit platters are a welcomed addition to a the array of food available at a funeral reception.
Fruit is a sweet, refreshing food guests can enjoy along with their dessert.
Fruit trays can be made with a variety of choices including:
strawberries
grapes
watermelon
cantaloupe
pineapple
kiwi slices
blueberries
raspberries
You can also make up fruit cups or bowls with a selection of fruit choices.
Vegetables
Vegetable platters are typically served along with the “mains” at a funeral reception. If you’re having sandwiches or finger food, a vegetable platter can be included on this table.
Vegetable platters can be prepared with an assortment of vegetables and dipping sauces including:
carrot sticks
celery sticks
cherry tomatoes
cucumber slices
broccoli
cauliflower
snap peas
red peppers
hummus
ranch dip
Desserts
Funeral receptions typically have a desserts table full of miniature sized desserts for guests to choose from.
It’s best to plan for an array of desserts, 4-5 different types to give a variety of choices to guests.
Each person will likely have 2-4 desserts, therefore you can adjust your numbers accordingly when making your mini desserts.
nanaimo bars
brownies
cheesecake squares
sugar cookies
macarons
shortbread cookies
scones
cupcakes
lemon bars
tarts
Charcuterie Board
Charcuterie boards are made with a variety of meats, cheeses, condiments, and crackers.
Meats are rolled or fanned out to create a textured look to the charcuterie board.
Soft and hard cheeses can be paired with meats, mustard, pickles, honey, or spreads (jelly’s, jam), layered on top of crostini’s, crackers, or slices of baguette.
You can include extra foods like grapes, arugula, hummus, dried fruits, and nuts for a complete charcuterie board for a funeral reception.
Pinwheels
Pinwheels are small circular appetizers that have savory fillings inside of them.
Pinwheels are made by using a tortilla, and spreading the filling over the tortilla in a thin layer.
The pinwheel is made by rolling up the tortilla, and then slicing it into 1/2-3/4″ rounds.
Garnish the meat balls with fresh parsley and sesame seeds.
You can place a toothpick into each meat ball for an easy serving finger food appetizer.
Deviled Eggs
Deviled eggs are a savory appetizer to serve, and are a good sized portion for guests.
Deviled eggs are made by boiling eggs until they are hard boiled, and then letting them cool down until you’re able to cut them in half.
The center portion of the egg is scooped out, and placed in a bowl. The cooked egg yolk is mixed together with mayo, diced dill pickles, mustard, pepper and paprika.
The filling is piped back into the white portion of the egg, and garnished with a bit more paprika.
Crostini’s
You can serve crostini’s with a variety of toppings so guests can pick and choose their favorites to try.
Crostini’s can be topped with:
cheese and prosciutto with arugula and balsamic reduction
fresh pesto mixed with diced tomatoes, topped with grated parmesan cheese
ricotta, sliced pears or apples, walnuts, drizzled with honey
mashed avocado topped with grilled garlic shrimp
watermelon bruschetta topped with balsamic reduction
goat cheese, apricot preserves, sprinkled with pistachios and mint leaves
garlic and dill cream cheese, slices of cucumber and radishes, topped with smoked salmon
Cold vegetable sandwiches can be enjoyed on a hot summer day, or as tea sandwiches.
Cold vegetable sandwiches can be prepared on sourdough, ciabatta, focaccia, French bread, croissants, pumpernickel, multigrain, whole wheat, rye, or white bread.
Havarti and Cucumber
Havarti and cucumber sandwiches can be made with mayo, Dijon mustard, honey mustard or Italian dressing.
Havarti is a creamy and slightly soft cheese which pairs well on a veggie sandwich with cucumber and tomatoes.
Havarti and cucumber sandwiches can be served on multigrain, white, or whole wheat bread.
cucumber
tomato
spinach
red onions
green pepper
Havarti
Pesto Mozzarella
Pesto mozzarella sandwiches are caprese sandwiches with a few added veggies.
You can use fresh mozzarella for this creamy sandwich, and fresh pesto spread on each side of bread to make this delicious sandwich.
Arugula is added to pesto mozzarella sandwiches for an earthy toned sandwich.
Pesto mozzarella sandwiches are best served on focaccia bread.
zucchini slices
red pepper
red onions
tomatoes
mozzarella
arugula
pesto
Apple and Brie
Apple and brie sandwiches are a rich and creamy cold sandwich with a hint of sweet fig jam and a little garlic finish to it.
Basil leaves and spinach add a bit of greenery and earthy flavors to the creamy brie sandwich.
Apple and brie sandwiches are best served on ciabatta bread.
brie
apple slices
fig jam
spinach
basil leaves
garlic mayo
Avocado and Cucumber
Avocado sandwiches can be served with garlic mayo, hummus, or balsamic as the sauce for your cold vegetable sandwich.
You can add a few greens such as red leaf lettuce or sprouts to your avocado sandwich.
garlic mayo or hummus
lettuce
sprouts
feta
cilantro
balsamic reduction
Jalapeno Havarti and Sundried Tomato
Jalapeno Havarti cheese sandwiches are spicy sandwiches made with chipotle mayo to give it a bit of a kick.
You can even add a few slices of pickled jalapenos in your sandwich if desired.
Jalapeno Havarti and sundried tomato sandwiches are best served on sourdough bread.
jalapeno Havarti
sundried tomatoes (julienned)
dill pickles (sliced thin)
sprouts
avocado slices
red onions
garlic mayo or chipotle mayo
Chickpea and Artichoke
Chickpea and artichoke sandwiches have a bit of citrus and earthy tones.
Mashed chickpeas are mixed together with red pepper, red onions, cucumber, parsley, fresh lemon juice and olive oil.
Spread chickpea mixture over one slice of bread, and top with spinach and basil leaves. Place the other piece of bread on top and enjoy.
Chickpea and artichoke sandwiches are best prepared on French bread.
mashed chickpeas
sliced artichoke hearts
red pepper
cucumber
red onions
parsley
spinach
lemon juice
olive oil
basil leaves
Mediterranean
Mediterranean sandwiches are filled with savory tzatziki sauce and feta cheese.
Mediterranean sandwiches are filled with juicy tomato and cucumber.
Feta and tzatziki sandwiches are best prepared on focaccia bread.
feta
tomato
lettuce
cucumber slices
red onions
tzatziki sauce
Cheddar and Tomato
Cheddar and tomato sandwiches are creamy, sharp and tangy.
Cream cheese is spread on one side of bread, and then layers of vegetables are piled on top.
Sharp cheddar cheese is added on top of the vegetables along with a few sprouts to make this cheddar vegetable sandwich.
Cheddar tomato sandwiches are best prepared on multigrain or rye bread.
cream cheese
tomato slices
cucumber slices
red onions
sprouts
avocado slices
lettuce
cheddar cheese
Hummus and Avocado
Hummus and avocado sandwiches are best made with garlic hummus.
Garlic is an invigorating flavor that ties the veggie sandwich together.
Hummus and avocado sandwiches are made with sprouts, lettuce, tomato, cucumber, and red onions.
Another option is to add garlic mayo on one side of the sandwich if desired.
Hummus sandwiches are best prepared on sourdough or multigrain bread.
hummus
avocado slices
sprouts
lettuce
tomato slices
cucumber slices
red onions
Swiss and Pickles
Swiss and pickle sandwiches are creamy and tart sandwiches with a hint dill flavor.
Swiss and pickle sandwiches are made with garlic mayo and whole grain mustard spread on each side of bread.
Swiss and pickle sandwiches are best served on pumpernickel bread.
Sandwiches are one of the most popular choices of foods you can prepare for a funeral reception.
Sandwiches are served cold, following a funeral ceremony.
Preparing sandwiches for funeral reception should be done in the morning of the day of the funeral, so that they can stay as fresh as possible. The bread will become soggy if sandwiches are prepared the day before.
You can pick 3-4 different types of sandwiches so you’ll have a variety for guests to choose from.
It’s best to prepare 1 sandwich per person attending.
Each sandwich you prepare can be cut into 4 triangles, 3 rectangles, or 2 circles so they are individually portioned and small in size.
Therefore, guests can pick and choose a few different types of sandwiches to enjoy.
Sandwiches can be prepared on sour dough, French bread, croissants, pumpernickel, multigrain, whole wheat, rye, or white bread.
Softened cream cheese is beat together using a hand mixer with mayo, sour cream, fresh lemon juice, minced garlic, dill, chives, onion powder, salt and pepper.
Each side of bread is coated in herbed cream cheese, and then slices of cucumber are placed on top.
The sandwich is closed with the other side of bread, and then you can cut the sandwich diagonally to make 4 triangle sandwiches.
Place a toothpick center of the sandwiches to hold it together.
herbed cream cheese
cucumber slices
Veggie
Cold veggie sandwiches are juicy and creamy sandwiches you can make with a variety of vegetables, cheeses, and sauces.
Cold Veggie Sandwiches:
pesto mozzarella: zucchini slices, red pepper, red onions, tomatoes, mozzarella, arugula, pesto
Havarti and cucumber: cucumber slices, tomato slices, spinach, red onions, green pepper, Havarti cheese
apple and brie: apple slices, brie cheese, fig jam, garlic mayo, spinach, basil leaves
Jalapeno Havarti and Sundried Tomato: jalapeno Havarti cheese, sundried tomatoes, dill pickle slices, sprouts, avocado slices, red onions, garlic mayo or chipotle mayo
Chicken salad sandwiches are made by mixing together mayo, sour cream, parsley, green onions, tarragon, fresh dill weed, fresh lemon juice, garlic powder and salt and pepper.
Cubed chicken, raisins, and toasted sliced almonds are mixed into sour cream mixture to full coat the chicken to made the chicken salad base.
Chicken salad is spread onto the bread in a thick layer, along with a few cucumber slices.
Another slice of bread is placed on top, and a toothpick is placed into the center of the sandwich to hold it together.
chicken
cucumber
raisins
toasted sliced almonds
mayo
sour cream
parsley
green onions
tarragon
fresh dill weed
fresh lemon juice
garlic powder
salt and pepper
Tuna Salad
Tuna salad sandwiches are a favorite sandwich for many with its creamy and crunchy texture.
Tuna salad sandwiches are made by mixing together mayo, Dijon mustard, green relish, fresh lemon juice and pepper.
Add drained tuna and chopped celery to the mayo base and mix well.
Spread tuna salad on top of one slice and bread, and add the other piece of bread on top.
Tuna salad sandwiches are ready to serve.
drained tuna
mayo
Dijon mustard
green relish
lemon juice
pepper
chopped celery
Strawberry, Basil and Cream Cheese
Strawberry sandwiches have a light fruity flavor to them with a bit of earthy tones from the basil leaves.
Strawberry sandwiches are typically made on white bread.
Strawberry jam is spread over one slice of bread, and softened cream cheese is spread on the other side.
Strawberry slices are layered on top of the cream cheese slice of bread, along with a few fresh basil leaves.
The other slice of bread is placed on top, and is ready to serve.
You can use a cookie cutter to cut a heart out of one slice of bread, and have a strawberry poking through the window for an extra special treat for guests.
Softened cream cheese is mixed together with minced garlic and fresh dill weed.
Assemble the sandwich by spreading a thin layer of herbed cream cheese on one slice of bread, and top with smoked salmon, red onions, alfalfa sprouts, fresh dill weed, capers, and a sprinkle of salt and pepper.
Add the other slice of bread on top, and place a toothpick in the center to hold it together.
smoked salmon
alfalfa sprouts
red onions
fresh dill weed
capers
herbed cream cheese
salt and pepper
Horseradish and Roast Beef
Horseradish and roast beef sandwiches have a little bit of a bite to them, with creamy finish.
Roast beef sandwiches are made by spreading a thin layer of mayo on one side of the bread, and horseradish on the other slice of bread.
Cold thinly sliced roast beef placed on top of the horseradish, along with Swiss cheese, watercress, and tomato slices.
Place the other piece of bread on top and a toothpick in the center of the sandwich to hold it together.
You can make a variety of finger food appetizer platters for a funeral reception.
Tea sandwiches, fruit and vegetable platters are welcomed choices for guests attending a celebration of life.
Finger foods can be kept small, and be individually portioned for guests to pick and choose what they would like to have.
Tea Sandwiches
Tea sandwiches are small sandwiches that are usually served with tea for a funeral reception.
Tea sandwiches are cut into rectangles or circles to give them a unique shape.
You can serve different types of sandwiches to accommodate for your guests such as:
ham and cheese
cucumber and cream cheese
egg salad
chicken salad
tuna salad
strawberry, basil and cream cheese
horseradish and roast beef
BLT Egg Sliders
BLT egg sliders are finger food appetizers that look like miniature burgers.
BLT egg sliders are made by cooking hard boiled eggs and then cutting them in half to create the “buns”.
The bottom half of the “buns” need to have a little bit of the bottom of the egg cut off so it can sit flat on a serving plate.
Add a little salt, pepper, and your favorite sauce (ketchup, mustard, mayo, hot sauce, horseradish) to the bottom half of the egg.
Assemble the egg sliders by placing a strip of freshly cooked bacon, a slice of tomato to fit right inside the slider, and a piece of lettuce.
Top the slider with the other half of the egg to make the sliders complete.
Garnish the egg sliders by adding a little more pepper and sesame seeds.
Place a toothpick through the egg slider to make sure it stays together.
You can make these ahead of time, and place them in the fridge until you’re ready to serve them.
Charcuterie Board
Charcuterie boards are made with a variety of meats, cheeses, condiments, and crackers.
Meats are rolled or fanned out to create a textured look to the charcuterie board.
Soft and hard cheeses can be paired with meats, mustard, pickles, honey, or spreads (jelly’s, jam), layered on top of crostini’s, crackers, or slices of baguette.
You can include extra foods like grapes, arugula, hummus, dried fruits, and nuts for a complete charcuterie board for a funeral reception.
Pinwheels
Pinwheels are small circular appetizers that have savory fillings inside of them.
Pinwheels are made by using a tortilla, and spreading the filling over the tortilla in a thin layer.
The pinwheel is made by rolling up the tortilla, and then slicing it into 1/2-3/4″ rounds.
Garnish the meat balls with fresh parsley and sesame seeds.
You can place a toothpick into each meat ball for an easy serving finger food appetizer.
Deviled Eggs
Deviled eggs are a savory appetizer to serve, and are a good sized portion for guests.
Deviled eggs are made by boiling eggs until they are hard boiled, and then letting them cool down until you’re able to cut them in half.
The center portion of the egg is scooped out, and placed in a bowl. The cooked egg yolk is mixed together with mayo, diced dill pickles, mustard, pepper and paprika.
The filling is piped back into the white portion of the egg, and garnished with a bit more paprika.
Crostini’s
You can serve crostini’s with a variety of toppings so guests can pick and choose their favorites to try.
Crostini’s can be topped with:
cheese and prosciutto with arugula and balsamic reduction
fresh pesto mixed with diced tomatoes, topped with grated parmesan cheese
ricotta, sliced pears or apples, walnuts, drizzled with honey
mashed avocado topped with grilled garlic shrimp
watermelon bruschetta topped with balsamic reduction
goat cheese, apricot preserves, sprinkled with pistachios and mint leaves
garlic and dill cream cheese, slices of cucumber and radishes, topped with smoked salmon
Sushi
Sushi is individually portioned, therefore guests can fill up their own plates with their choice of sushi rolls.
You can serve a few different types of sushi for your guests such as:
vegetable rolls
avocado rolls
cucumber rolls
California rolls
Cookies
Cookies for a funeral reception should be kept quite small.
Many people feel overwhelmed celebrating the life of their loved one, therefore they don’t want too much of anything.
A little treat, that’s small enough to enjoy in a couple bites is the best choice for preparing cookies for a funeral reception.
You can make cookies that are shaped into hearts for celebrating the life of a loved one that you’ll carry in your heart forever.
A heart shaped cookie can be decorated with writing if you like with a few sayings if desired:
Celebrating the life of a loved one is never easy.
You want to honor them with dignity and grace, and share all of your memories with family and friends.
Sometimes it can be hard to find the words to express how much they meant to you.
You can write heartfelt words as a tribute to their memory on their cake for their celebration of life.
In our hearts and memories forever
In our hearts and memories forever reminds us that we will carry their memory in our heart.
They are never forgotten.
We are changed for having met them, and making such a difference in our lives.
Celebrating the life of “name” “year of birth – year of death”
Celebrating the life of your loved one is remembering all of the happy times you spent together and being able to share some of the special stories about them.
You can even include a image from their childhood on their celebration of life cake as a special memento to remembering.
Your wings were ready, but our hearts were not. We miss you “name”
Your wings were ready, but our hearts were not is remembering that it’s always hard to say that final goodbye.
It’s coming to the realization that we might not have been able to say everything that we wanted to say to them.
This is the time to share with family and friends what you might have said if you had the chance.
Always in our thoughts, forever in our hearts. In Memory of “name”
Always in our thoughts, forever in our hearts is thinking back to all of the treasured lessons and reminiscing about past times that will go on in our hearts forever.
In loving memory “name”
In loving memory is recalling the life of loved one who meant so much to us. You are reminded of their incredible life that meant so much to so many.
A life that touches others goes on forever. In loving memory of “name”
A life that touches others goes on forever is a special remembrance that we have become a better person for having known them and spent time with them. We have grown and will continue to grow with their memory in our hearts.
Gone but never forgotten
Gone but never forgotten is a reminder that we will carry them in our hearts forever.
Our memory of them will live on within us.
In loving memory of “family members title (mom/dad/grandma/grandpa)”
In loving memory of our family member is giving them the title they earned.
They were such a big part of our life, and we need to remember them for their dedication to their family and being there for us when we needed them most.
We use cookies to ensure that we give you the best experience on our website. If you continue to use this site we will assume that you are happy with it.