Mother’s day is a time to celebrate with family and appreciate everything mom’s do.
You can make macarons to honor your mom for everything she’s done for you with a few extra decorations and piping techniques.

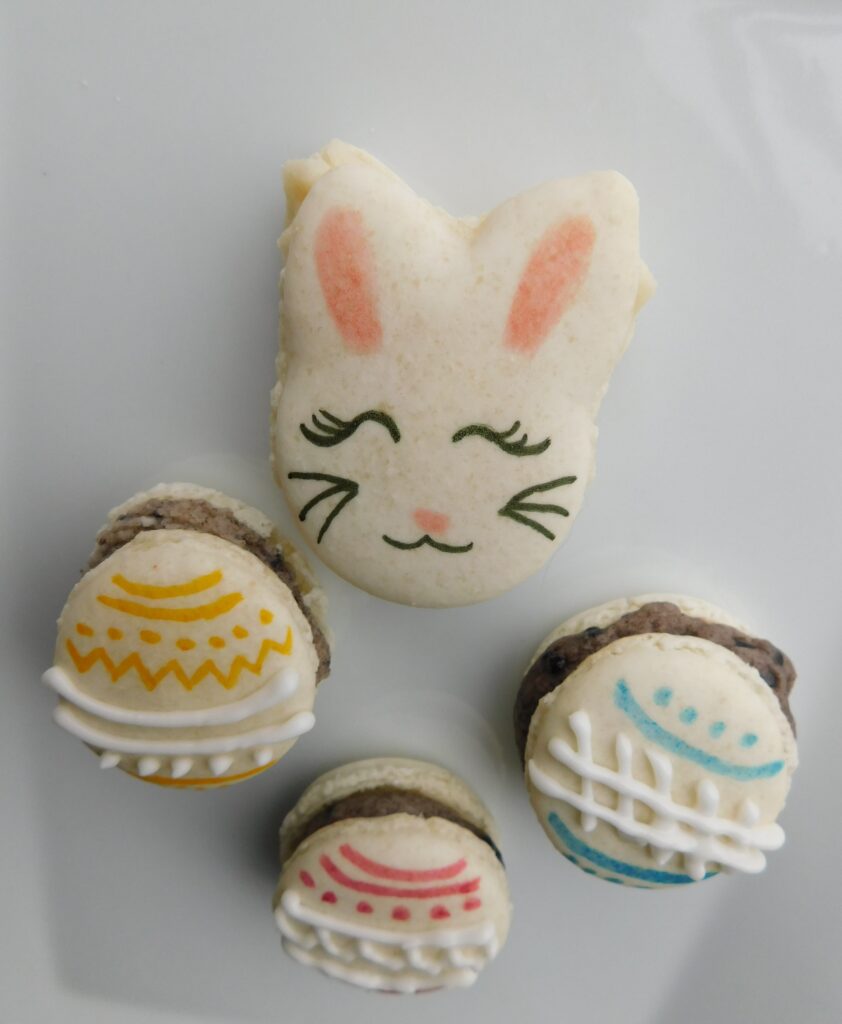
Painting Designs
Designs
You can create your own theme to your mother’s day macarons depending on what your mom loves!
For my mum she likes gardening and playing golf, therefore I painted a putting green and a few flowers that she grows in her garden.

Words
You can paint words onto your mother’s day macarons:
- mom
- mum
- thank you
- happy mother’s day
- mother’s day
- thank you mom
Paint
You can paint on macarons to create designs and words by using either powdered food coloring or gel food coloring with a couple of drops of almond extract.
You don’t want to use too much almond extract. If you pour too much, the color will be more like watercolor paint.
If you just use a little almond extract, the color will be strong and easily painted on the macaron. The color will not run.
You can use pink or red food coloring and make hearts onto your macarons as a symbol to recognize the love you have for your mom.

Paint Brushes
You’ll need to use a food safe paint brush to make your painted decorations on macarons.
Flowers
Round Flower Petals
- Dip a flat paint brush into food coloring.
- Touch the flat brush to the macaron.
- Push the brush in an upwards and to the right slightly, then bring it back down to the original starting point.
- Repeat to make 5-6 flower petals.
- Make dots in the center of the flower using a black edible marker.

Tulip
- Dip a flat paint brush into food coloring.
- Touch the flat brush to the macaron.
- Push the brush in an upwards and to the right slightly, then bring it back down.
- Put the brush in the original position, and then push the brush downwards and to the right. Bring the brush back up and line it up with the first brush strokes to create a tulip shape.

Leaves and Vines
To make leaves or vines on macarons, use a long fine tipped paint brush. This will let you create fine leaf shapes, or narrow vines underneath flowers painted on macarons.
Draw
Edible markers can be used to draw words, or make small details onto macarons like in the center of a flower.
You can get many different colors in edible markers to use to create beautiful decorations onto macarons.
Icing
To decorate mother’s day macarons, you can make royal icing for some fine detail work.
Royal icing will dry hard, and you can use piping tips to create small lines on your mother’s day macarons.
Royal icing can be hard to work with. If your icing is too runny, add a little bit more icing sugar to stiffen it up. Then you can write words with it, or make wavy lines for a beautiful look to your mother’s day macarons.

Caramel or Chocolate Drizzle
Caramel and chocolate can be drizzled on top of your mother’s day macarons, and you can even add a few sprinkles or nuts on top.
To add caramel or chocolate drizzle, place your macarons on a large plate.
Put caramel or melted chocolate into a piping bag, fitted with #2 piping tip.
The flow will come fast, you won’t even need to squish the bag for the flow to come out.
Make one line on 1 half of the macaron. Continue making 2 more lines that criss-cross a little to have an elastic band look to it.
You can add nuts or sprinkles to the drizzle to add a pop of color.

Piping Shapes
Macaron batter can be piped into a heart shape for your mother’s day macarons.
You can use a template to create heart macarons, or you can just free hand them.
Heart macarons can be colored pink, or you can have them as plain white batter as well.
If you’re wanting to color your macaron batter, use a little bit of pink gel food coloring to color your heart macarons.
Fill your piping bag with your macaron batter fitted with a 1/2” tip.
Begin by piping one of the round tops of the heart, drag the tip downwards in a diagonal. Continue piping upwards to end at the other round top of the heart.
Take a toothpick and gently guide the point of the bottom of the heart downwards to create a sharp point of your macarons.
Let them dry for 30 minutes, and then bake in the oven for the same time your recipe says.
Mother’s day heart macarons should be 1.5″-2″ once you’ve piped them.