Silpat silicone baking mats are one of the most durable, long lasting, temperature withstanding silicone mats available. They are professional grade quality with many bakeries choosing to bake with Silpat silicone baking mats.
2000-3000 uses
up to 500°F in the oven – much more heat resistant than other silicone baking mats (~420°F)
several sizes available that fit perfectly in a baking sheet
commercial grade
I have used my Silpat baking mats for over a year now with baking many different foods:
macarons
croissants
scones
chocolate decorations
I find the Silpat silicone mats are much higher quality than my other silicone mats. They are able to withstand the high usage and high temperatures. I love the way my macarons turn out using the Slip
I find the Silpat silicone mats are much higher quality than my other silicone mats. They are able to withstand the high usage and high temperatures.
I love the way macarons turn out using the Silpat silicone baking mat. They give them a beautiful matte round finish to them which makes them look professional, like they came from a commercial bakery.
At first, I used parchment paper to bake macarons, but after getting more comfortable making macarons I like using the Silpat much better.
My favorite dessert to make with Silpat silicone baking mat are chocolate decorations.
I can easily pipe chocolate directly on the silicone mat and then place it in the freezer.
The silicone baking mat is much thicker, so I find I don’t easily ruin the design.
Using parchment paper for chocolate decorations is much more difficult because it’s flimsy, and easily movable which can disturb the design. I much prefer using the Silpat silicone baking mat.
When I make croissants, I find the Silpat silicone mat very easy to use for rolling out my croissant dough. I like having a couple of silicone mats. One for rolling out the dough, and one for shaping the butter layer.
The butter layer is easily manipulated on the silicone mat, since it remains in one place without moving.
I find using cling wrap is much more difficult to make the butter layer since it moves around and it quite flimsy. I find it hard to place it on a plate and then into the fridge, and somehow get it off of the plate in one piece to place into the croissant dough for lamination. The butter layer frequently breaks on me if I use cling wrap.
It’s much easier and I’ve had no issues at all with the butter layer breaking when I use my Silpat silicone mat. I would recommend to use it for anyone attempting croissants.
I have used my Silpat silicone baking mat for baking croissants on as well and so far I’m very impressed with how well they have turned out.
Silpat baking mat sizes
Full Sheet Size, 16-1/2″ x 24-1/2″
Countertop Workstation Mat, 15-1/8″ x 23″
Half Sheet Size, 11-5/8 x 16-1/2
Toaster Oven Baking Mat – 7 7/8″ x 10 7/8″
Octagonal Microwave Size Baking Mat – 10 1/4″
Round, 12″
Cake Liner Round 9″
Silpat temperature range
Silpat’s can be used in frozen environments and up to 500°F in the oven.
Silpat mat vs parchment paper
Silicone Baking Mat (Silpat)
Parchment Paper
Reusable
One time use
Lines a baking sheet
Can line many different baking pans such as: baking sheet, loaf pan, deep baking sheet, cake pans
Cookies - need to cook for a couple min longer than parchment paper, roast vegetables, caramel, butter lamination
Cookies, scones, cakes, breads
Do not use over 500 degrees F. Ok to use for almost every temperature in the oven
Do not use over 420 degrees F - has the potential to burn the paper
Flatter more rounder cookies
Cookies will be taller and will not spread out as much
Silpat silicone mat vs parchment paper for making macarons
Silpat silicone mats are the gold standard for baking macarons. However, sometimes the macarons need a bit of longer bake time when using a Silpat silicone mat vs using parchment paper. Silpat silicone mats allow macarons to spread wider, which produces more of a rounder and flatter macaron than using parchment paper. This gives the macarons a more professional look to them when baked with a Silpat silicone mat.
Silicone baking mats are one of the most versatile kitchen accessories you can have as a baker. Silicone baking mats have a couple of special things about them that make them unique.
no greasing necessary
no flour required on the silicone baking mat to roll out dough
capable of almost every temperature in the oven and in the freezer
easy to clean – wipe with a damp cloth
reusable
Make sure silicone baking mat is clean. Place it on a baking sheet.
Pipe or place dough, batter, etc. on the baking mat.
Bake food for required time on your recipe.
Remove the food from the oven.
Let macarons cool while still on the baking mat. Other foods can be taking off of the silicone baking mat and onto a cooling rack.
Wipe the silicone baking mat clean with a damp cloth and set to dry.
Silicone baking mat can be rolled up or stored flat.
When you’re using your silicone mat, make sure it’s completely free of grease, debris, etc. You only want to use your silicone baking mat when it’s very clean. If it has residual grease on the baking mat, your macarons will absorb the grease and will not turn out.
If you’re using a silicone baking mat for macarons, you need to bake them for an extra minute or two. The texture of the silicone requires them to be baked longer than using parchment paper. Otherwise, the macarons will come off of the silicone baking mat not fully cooked. They will be a bit gummy on the bottom, making them not a perfect flat bottom.
Pipe the macaron batter directly on the silicone baking mat. Let them dry for 30 minutes, and then bake them for the required amount of time, plus 1-2 minutes.
Drying the macarons for 30 minutes allows a skin to form on the macarons, which makes them have a perfect shell when they bake.
How to use a silicone baking mat for chocolate
Silicone mats are special because they have a bit of a thickness to them, which makes it very easy to peel delicate foods of the silicone mat.
Silicone baking mats can easily be put in the fridge or freezer for intricate foods like piped chocolate decorations.
Place the silicone baking mat in the freezer with your piped chocolate decorations for about 20 minutes. You can gently peel the chocolate off of the mat, and then use for your dessert decoration.
Place your dough directly on the silicone baking mat. Only flour your rolling pin and the dough. Roll out your dough to your required thickness. You can use cookie cutters to cut the cookie dough out while the dough is still on the mat. Gently lift the cookie off with a a flat spatula.
How long do silicone baking mats last
Silicone baking mats last 2000-3000 bakes in the oven. Depending on how many times you bake per year, your silicone baking mats should last 5-10 years.
Silicone baking mat substitute
You can substitute parchment paper for a silicone baking mat. Silicone baking mats act as reusable parchment paper.
Silicone baking mat vs Parchment paper
Silicone Baking Mat (Silpat)
Parchment Paper
Reusable
One time use
Lines a baking sheet
Can line many different baking pans such as: baking sheet, loaf pan, deep baking sheet, cake pans
Cookies - need to cook for a couple min longer than parchment paper, roast vegetables, caramel, butter lamination
Cookies, scones, cakes, breads
Do not use over 500 degrees F. Ok to use for almost every temperature in the oven
Do not use over 420 degrees F - has the potential to burn the paper
Flatter more rounder cookies
Cookies will be taller and will not spread out as much
Are silicone baking mats dishwasher safe
Silicone baking mats are not dishwasher safe. They need to wiped down with a cloth and a small amount of dish soap to remove any grease that may be present. This will help the silicone mat retain it’s life and remain well kept for future baking.
If your chocolate isn’t fully solidified, it will be too soft to remove from the silicone mold all in one beautiful piece. It may be sections missing from the chocolate due to it not hardening.
Place the chocolate in the fridge for about 20 min until it’s solidified, then you can remove the chocolates from their molds.
Silicone mold has too much excess chocolate
One of the biggest culprits of not being able to remove chocolate from a silicone mold easily is from having too much excess chocolate on the silicone mold.
Remove the excess chocolate while it is still warm by using a bench scraper to scrape away the excess chocolate. This will give the chocolates a nice even back to them.
Chocolate has air bubbles throughout
Air bubbles are common with tempering chocolate. To remove the air bubbles before your chocolate hardens, tap the mold on the counter after you have filled them. This will make a beautiful chocolate without imperfections, and be much easier to remove from the silicone mold.
How to get chocolate out of silicone molds without breaking
Place chocolate in fridge for 20-30 min depending on the size of chocolate.
Remove from the fridge and turn the mold upside down on a plate.
If the silicone mold is quite large, start by gently removing the edges of the mold from the chocolate. Go around the entire edge and pull the mold away from the chocolate.
With the silicone mold close to the plate, gently press the top of the mold of each chocolate with your thumb to delicately take the chocolate out without breaking it.
Chocolate is removed safely and remains fully intact.
No. You do not need to grease silicone chocolate molds. Just use the molds as is. They should be clean and dry before using silicone molds for chocolate.
How to store your chocolates made from silicone molds
Store your freshly made chocolate that you made in your silicone mold at room temperature. Store your chocolate in an airtight container in the cabinet where it will stay a constant temperature. Chocolate doesn’t like temperature fluctuations.
If you store your tempered chocolate in the fridge or freezer, the cocoa butter comes to the surface of the chocolate creating a white precipitate on the outer layer of the chocolate.
Put your dough on top of the pastry mat. There is no need to flour your pastry mat. Only flour your dough and the rolling pin.
Roll out your dough to the required length.
Peel the dough from the pastry mat and it’s ready to use for baking or your next step in your baking recipe.
How to use a pasty mat to roll out a butter layer for croissants or puff pastry
Place your pastry mat on a hard flat surface.
Make sure your butter is at room temperature.
Using a spatula, put the butter on the pasty mat. Gently spread the butter outwards creating a rectangle. Continue spreading the butter until it’s the exact required measurement needed for your recipe. Use the spatula to make the edges a perfect rectangle.
Place the butter in the fridge for 30 min. You can now add your butter layer into your croissant dough or puff pastry dough.
How to use a pasty mat to bake pastries
To bake pastries with a pastry mat, have your dough ready to bake.
Place the silicone pastry mat onto a baking pan. There is no need to grease the silicone pastry mat.
Put your pastry dough into shapes and place on the silicone mat.
Bake for the time your recipe calls for.
Remove the pastries from the oven and place on a cooling rack.
Clean the pastry mat by wiping it down with a wet cloth and some dish soap.
How to use a pasty mat to make fancy chocolates
To make fancy chocolate decorations with your pastry mat, begin by melting your chocolate.
Place your silicone mold on a plate or baking pan.
Take a spoon and dip it in your chocolate. Using the back of the spoon, spread the chocolate into a leaf shape. It should be round and big at the bottom, with a narrow end. The narrow end doesn’t have to be a perfect point, or even. It’s beautiful to have the leaf going off to one side, and not uniform.
Repeat with how many leaves you want to make. Place them one in front of one another in a line.
Place the silicone baking mat in the fridge, taking care to have an object prop the chocolate up a bit to give it a leaf shape. The pastry mat only needs to be bent a little bit.
Remove from the fridge after 30 min to 1 hour until the chocolate is solidified, and then it’s ready to use as a fancy chocolate decoration.
You can use this method to create many different chocolates. Try piping chocolate directly onto the mat. You can make snowflakes, hearts, writing, etc. in this way using your pastry mat.
How to use a pasty mat to make hazelnut spread
To make hazelnut spread, roast your hazelnuts and remove the skins.
Make caramel sauce by combining sugar and water over medium heat in a saucepan until it’s an amber-golden color.
Place the hazelnuts into the caramel sauce.
Spread the mixture onto a silicone pastry mat. Let it cool to room temperature to solidify.
Break the solidified caramel into smaller pieces and blend with a food processor. You can use this as hazelnut spread, or you can go further and create a hazelnut sauce by adding your hazelnut spread to heavy cream.
How to use a pasty mat to spread caramel sauce
Create your caramel sauce by heating sugar and water over medium heat until it’s amber-golden in color.
Your caramel is ready to use. You can break it into pieces and add it to the top of ice cream or desserts. You could also use it to make almond roca for a Christmas gift.
Silicone molds can be used to create dazzling desserts like an ice cream dome cake, chocolate cups, tuiles, mousse cake, hot chocolate bombs, and more!
Silicone isn’t the best for using in the oven, because silicone does not conduct heat like aluminum does.
It’s best to use silicone molds for desserts that require chilling, freezing, or shaping.
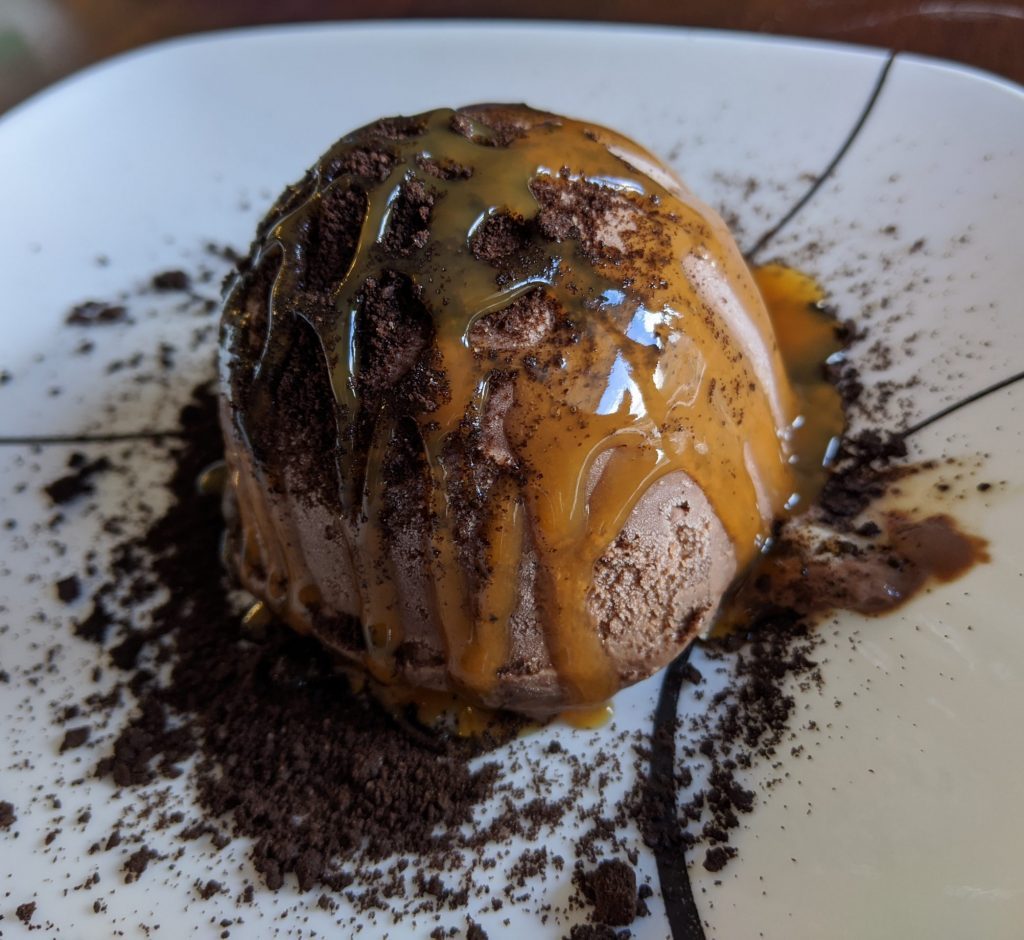
Ice Cream Dome Cake
An ice cream dome cake is made using 2 different ice creams that are layered on top of one another in the silicone mold.
The center filling is placed in the middle of the silicone mold.
The center filling is typically a sweet filling such as jam, ganache, chocolate sauce, caramel, fruit or sauce.
The silicone mold is frozen overnight, and then the mold is removed right before serving.
Toppings are sprinkled on top of the dessert to create a beautiful ice cream dome cake.
Chocolates
You can make your own fancy chocolates at home with homemade fillings using small silicone molds.
Temper your chocolate, or melt it in the microwave, and then fill your small silicone molds about 1/3 of the way fill, but make sure the chocolate goes all the way up the sides of the mold.
This will ensure the filling will be completely encased by chocolate. You can use a pastry brush to guide the chocolate up the sides of the silicone molds.
Place the silicone mold in the fridge for about 20 minutes to let it harden up.
Spoon a small amount of filling into each of the chocolates (caramel sauce, hazelnut sauce, etc.).
Melt your chocolate again if it’s hardened up, and then pour the chocolate over the silicone mold to completely encase the filling with chocolate.
Using a bench scraper, scrape the excess chocolate off of the molds, and then place the silicone mold in the fridge for another 20 minutes.
Mousse cake is a layered cake that uses silicone molds to make it into a sphere shape.
Mousse cake is made by using a mousse recipe that has been stabilized with gelatin.
Chilled mousse can be spooned into a half sphere silicone mold and guiding it up the sides of the mold.
Leave about 1/4″ thickness from the top of the mold, and a divot in the center for the filling.
Fill the divot of your silicone mold with a sweet center filling.
You could use dark chocolate ganache, raspberry jam, or chopped up fruit and place it in the center touching the mousse.
The bottom of the mousse cake can now be added to the silicone mold. This will be what fills the bottom of the mold, and the cake will stand up straight and have a flat bottom.
Use a metal cookie cutter or a glass to gently cut the cookie into pieces that will fit perfectly for your silicone mold. Try to get it as exact as possible or a little smaller.
Place the cookie on top of the mousse and center filling, and gently press it in so it will adhere to the mousse. It’s ok to have the mousse come around the edges.
Freeze the mousse cake for about 4 hours to let it set.
Remove the mousse cake from the freezer and gently peel back the silicone mold.
You can add a mirror glaze to the top of your mousse cake, or a simple syrup to make it shine.
You can dust the top with powdered sugar, cocoa powder, coconut flakes, or add a small amount of whip cream to the top to finish it off.
Shaped Tuiles
Tuiles are a thin crispy cookie. You can fill tuiles with sweet fillings such as mousse, chantilly cream, custard, and curd.
Tuiles are made by making a thin cookie batter, and then shaping it on a silicone baking mat with the back of the spoon. Tuiles are baked in the oven until the edges start to turn a golden brown.
Tuiles need to be shaped right after coming out of the oven, otherwise they solidify and you can’t mold them into a shape.
For this particular dessert, a rectangular shaped tuile was made, and then baked in the oven.
The rectangle cookie was gently placed inside a half sphere silicone mold, and then let to set and solidify.
You can pipe mousse or chantilly cream on the inside the tuile, and then place a macaron on in the middle of the tuile to create a beautiful dessert for your family and friends.
Chocolate Cups
Chocolate cups can be used to hold mousse, or ice cream to create a beautiful and decadent dessert.
Chocolate is melted in the microwave, and then a pastry brush is used to paint the chocolate onto the silicone mold.
The trick to making chocolate cups with silicone molds is making sure the sides of the cup are quite thick.
The thicker the sides, the less likely the sides will break.
Place the fully coated chocolate silicone mold in the freezer for 1 hour until it’s fully hardened.
To remove the chocolate cup from the silicone mold, pull the sides of the silicone mold until you have removed the edge of the chocolate all the way around the mold.
Once the bottom edge is completely separated, press the top of the mold to release the chocolate cup from the silicone mold.
To make the edges nice and perfect, melt the edge on a warm plate.
The gummy bears take 24 hours to fully solidify in the fridge.
Candies
Candies are sugar filled desserts that are quite hard and can be made into beautiful shapes using silicone molds.
You can make honey hard candies by combining sugar, water and lemon juice in a saucepan over medium high heat. As soon as it begins to boil, honey added and the temperature is turned down.
Candies are heated until they reach 295°F-310°F on a candy thermometer.
Candies are carefully poured over a silicone mold and then let to set over the next few hours as they cool down.
Peanut Butter Cups
Peanut butter cups are chocolates filled with creamy peanut butter in the center.
Chocolate is melted and then a pastry brush is used to paint the sides of a ribbed silicone mold.
The silicone mold is placed in the freezer for 1 hour until it has fully hardened.
A spoonful of peanut butter is placed in the center of the ribbed silicone mold.
Chocolate is melted and then poured overtop of the peanut butter to completely encase the peanut butter to create the peanut butter cup.
The peanut butter cup is placed in the freezer for 1 hour to solidify it.
Remove the peanut butter cup from the silicone mold by pressing the top of the mold to release the peanut butter cup from the silicone mold.
Hot Chocolate Bombs
Hot chocolate bombs are made by using half sphere silicone molds that have a flat finished edge to them.
Chocolate is melted in the microwave, and then a pastry brush is used to paint the chocolate up the sides of the silicone mold.
The chocolate coated silicone molds are placed in the freezer for about an hour to harden up.
Gently pull the silicone mold away from the chocolate on the edges. Go around the whole circle gently removing the edges of the chocolate from the silicone mold.
Place the semi-circle chocolates on a warm plate to melt the edges of the chocolate. This will be to seal the hot chocolate bomb later.
Fill one half of the semi-circle with 1 tbsp of cocoa powder, sprinkles, and marshmallows.
Hold the filled semi-circle in one hand. Put the other semi-circle on top and gently press the 2 together to create a seal.
You can decorate your hot chocolate bomb using white chocolate, gold dust, or sprinkles.
Caramels
Caramels have a sweet burnt sugar flavoring that you can make into small candies using silicone molds.
Caramels are made by heating together sugar, honey, and vanilla until it becomes a golden brown color.
Butter is slowly added to the saucepan and whisked into the caramel.
In another saucepan, heavy cream is heated until it begins to simmer.
Heated heavy cream is slowly poured into the caramel along with a pinch of salt.
Caramel is heated until it reaches 260°F.
Caramels are poured into small silicone molds, and then they will set on their own over the next couple of hours.
We use cookies to ensure that we give you the best experience on our website. If you continue to use this site we will assume that you are happy with it.