In order for sprinkles to adhere to the macaron batter, you need to sprinkle only a few sprinkles onto the macaron batter just after you’ve piped them.
Pipe 1.5″ macarons
Immediately add sprinkles to piped macarons. Only add a couple of sprinkles. If you add too many, the macarons could potentially not turn out. You can add sprinkles decoratively to an edge, in the center, or in a circle around the edge.
Bake your macarons for the exact time required in your recipe.
Let cool. Fill macarons with filling.
Decorative sprinkles are an added touch to your macarons. It’s a simple decoration to add, yet it brings out so much in a macaron.
How to make Character Macarons using a Parchment Paper Tracer
Place a template parchment paper tracer underneath your Silpat mat or Clean parchment paper that you’re going to pipe your macarons onto. You can find templates on Pinterest and Google. To make character macarons print off a template or free hand your own template.
Once you have your template under you surface you’re going to pipe onto, gather all of your materials that you’ll need for your template:
Now you can start piping onto your template. Begin with the smaller and more delicate details first. For example – wheels on a car, ears, horns, hands, feet. Use a toothpick to pull the batter into a point or fine details like fingers/toes if needed.
After you’ve piped the small details, begin piping your larger details/base of your macaron. This could be a different color of macaron batter. It’s best to trace the outline of the template, then fill in the center with batter. This way you won’t make the macarons too big and overtake the template design.
Let your macarons dry completely – about 30 min.
Bake your macarons for the same amount of time in your recipe.
Let the shells cool to room temperature – about 20 min.
How to make Character Macarons by Layering Macaron batter
Character macarons can be made by layering macaron batter.
Place a parchment paper template underneath the surface you are going to pipe your macarons onto.
Gather your materials – macaron batter, toothpicks, etc.
Start creating the base of your macaron. Tract the lines and fill in the center. You could be using multiple colors for eyes, body, feet, etc.
Let your base dry for 15 minutes.
Add on your second layer of macaron batter – generally this is a different color. You can add a nose, eyes, mouth, hands, feet, etc. on top of your base color.
Let your second layer dry for 15-30 min until a skin forms on the macaron.
Bake for your required time according to your recipe.
Let cool at room temperature for ~ 20 min.
Add more decorations to your macarons – draw on eyes, face, mouth by using an edible marker, add buttercream icing decorations if desired.
Silicone molds can be used to create dazzling desserts like an ice cream dome cake, chocolate cups, tuiles, mousse cake, hot chocolate bombs, and more!
Silicone isn’t the best for using in the oven, because silicone does not conduct heat like aluminum does.
It’s best to use silicone molds for desserts that require chilling, freezing, or shaping.
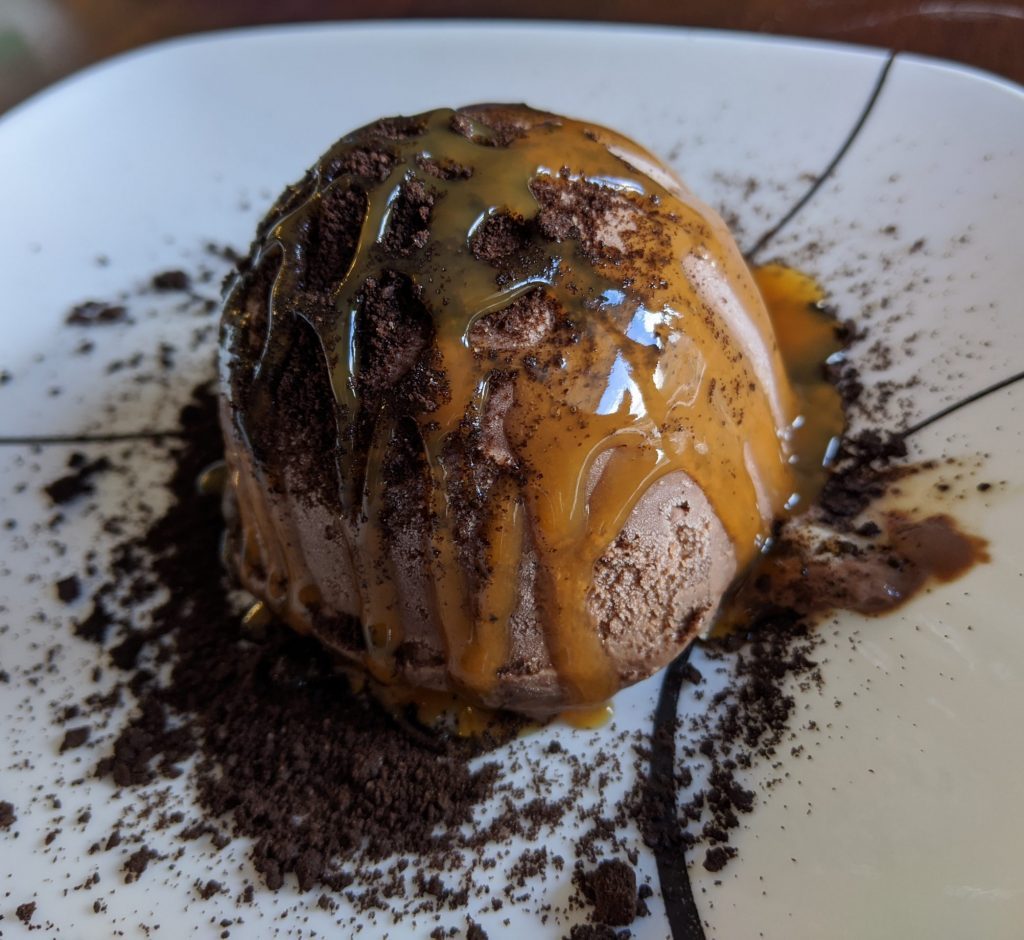
Ice Cream Dome Cake
An ice cream dome cake is made using 2 different ice creams that are layered on top of one another in the silicone mold.
The center filling is placed in the middle of the silicone mold.
The center filling is typically a sweet filling such as jam, ganache, chocolate sauce, caramel, fruit or sauce.
The silicone mold is frozen overnight, and then the mold is removed right before serving.
Toppings are sprinkled on top of the dessert to create a beautiful ice cream dome cake.
Chocolates
You can make your own fancy chocolates at home with homemade fillings using small silicone molds.
Temper your chocolate, or melt it in the microwave, and then fill your small silicone molds about 1/3 of the way fill, but make sure the chocolate goes all the way up the sides of the mold.
This will ensure the filling will be completely encased by chocolate. You can use a pastry brush to guide the chocolate up the sides of the silicone molds.
Place the silicone mold in the fridge for about 20 minutes to let it harden up.
Spoon a small amount of filling into each of the chocolates (caramel sauce, hazelnut sauce, etc.).
Melt your chocolate again if it’s hardened up, and then pour the chocolate over the silicone mold to completely encase the filling with chocolate.
Using a bench scraper, scrape the excess chocolate off of the molds, and then place the silicone mold in the fridge for another 20 minutes.
Mousse cake is a layered cake that uses silicone molds to make it into a sphere shape.
Mousse cake is made by using a mousse recipe that has been stabilized with gelatin.
Chilled mousse can be spooned into a half sphere silicone mold and guiding it up the sides of the mold.
Leave about 1/4″ thickness from the top of the mold, and a divot in the center for the filling.
Fill the divot of your silicone mold with a sweet center filling.
You could use dark chocolate ganache, raspberry jam, or chopped up fruit and place it in the center touching the mousse.
The bottom of the mousse cake can now be added to the silicone mold. This will be what fills the bottom of the mold, and the cake will stand up straight and have a flat bottom.
Use a metal cookie cutter or a glass to gently cut the cookie into pieces that will fit perfectly for your silicone mold. Try to get it as exact as possible or a little smaller.
Place the cookie on top of the mousse and center filling, and gently press it in so it will adhere to the mousse. It’s ok to have the mousse come around the edges.
Freeze the mousse cake for about 4 hours to let it set.
Remove the mousse cake from the freezer and gently peel back the silicone mold.
You can add a mirror glaze to the top of your mousse cake, or a simple syrup to make it shine.
You can dust the top with powdered sugar, cocoa powder, coconut flakes, or add a small amount of whip cream to the top to finish it off.
Shaped Tuiles
Tuiles are a thin crispy cookie. You can fill tuiles with sweet fillings such as mousse, chantilly cream, custard, and curd.
Tuiles are made by making a thin cookie batter, and then shaping it on a silicone baking mat with the back of the spoon. Tuiles are baked in the oven until the edges start to turn a golden brown.
Tuiles need to be shaped right after coming out of the oven, otherwise they solidify and you can’t mold them into a shape.
For this particular dessert, a rectangular shaped tuile was made, and then baked in the oven.
The rectangle cookie was gently placed inside a half sphere silicone mold, and then let to set and solidify.
You can pipe mousse or chantilly cream on the inside the tuile, and then place a macaron on in the middle of the tuile to create a beautiful dessert for your family and friends.
Chocolate Cups
Chocolate cups can be used to hold mousse, or ice cream to create a beautiful and decadent dessert.
Chocolate is melted in the microwave, and then a pastry brush is used to paint the chocolate onto the silicone mold.
The trick to making chocolate cups with silicone molds is making sure the sides of the cup are quite thick.
The thicker the sides, the less likely the sides will break.
Place the fully coated chocolate silicone mold in the freezer for 1 hour until it’s fully hardened.
To remove the chocolate cup from the silicone mold, pull the sides of the silicone mold until you have removed the edge of the chocolate all the way around the mold.
Once the bottom edge is completely separated, press the top of the mold to release the chocolate cup from the silicone mold.
To make the edges nice and perfect, melt the edge on a warm plate.
The gummy bears take 24 hours to fully solidify in the fridge.
Candies
Candies are sugar filled desserts that are quite hard and can be made into beautiful shapes using silicone molds.
You can make honey hard candies by combining sugar, water and lemon juice in a saucepan over medium high heat. As soon as it begins to boil, honey added and the temperature is turned down.
Candies are heated until they reach 295°F-310°F on a candy thermometer.
Candies are carefully poured over a silicone mold and then let to set over the next few hours as they cool down.
Peanut Butter Cups
Peanut butter cups are chocolates filled with creamy peanut butter in the center.
Chocolate is melted and then a pastry brush is used to paint the sides of a ribbed silicone mold.
The silicone mold is placed in the freezer for 1 hour until it has fully hardened.
A spoonful of peanut butter is placed in the center of the ribbed silicone mold.
Chocolate is melted and then poured overtop of the peanut butter to completely encase the peanut butter to create the peanut butter cup.
The peanut butter cup is placed in the freezer for 1 hour to solidify it.
Remove the peanut butter cup from the silicone mold by pressing the top of the mold to release the peanut butter cup from the silicone mold.
Hot Chocolate Bombs
Hot chocolate bombs are made by using half sphere silicone molds that have a flat finished edge to them.
Chocolate is melted in the microwave, and then a pastry brush is used to paint the chocolate up the sides of the silicone mold.
The chocolate coated silicone molds are placed in the freezer for about an hour to harden up.
Gently pull the silicone mold away from the chocolate on the edges. Go around the whole circle gently removing the edges of the chocolate from the silicone mold.
Place the semi-circle chocolates on a warm plate to melt the edges of the chocolate. This will be to seal the hot chocolate bomb later.
Fill one half of the semi-circle with 1 tbsp of cocoa powder, sprinkles, and marshmallows.
Hold the filled semi-circle in one hand. Put the other semi-circle on top and gently press the 2 together to create a seal.
You can decorate your hot chocolate bomb using white chocolate, gold dust, or sprinkles.
Caramels
Caramels have a sweet burnt sugar flavoring that you can make into small candies using silicone molds.
Caramels are made by heating together sugar, honey, and vanilla until it becomes a golden brown color.
Butter is slowly added to the saucepan and whisked into the caramel.
In another saucepan, heavy cream is heated until it begins to simmer.
Heated heavy cream is slowly poured into the caramel along with a pinch of salt.
Caramel is heated until it reaches 260°F.
Caramels are poured into small silicone molds, and then they will set on their own over the next couple of hours.
Heavy duty – will not split, even with thick mixtures
Surface prevents slipping and folding over. Maintains its upright shape
Fits both tips and couplers
Dispenser for easy access
45 degree angle – ideal for piping decorations
Sizes = 12’’, 18’’, 21’’
Disposable bags, no risk of contamination with washing reusable bags
How do you choose the size of a piping bag?
Select your piping bag based on how large your recipe is. There are 12″-21″ piping bag sizes.
Usually for icing a dozen cupcakes you can go with the 12″ bags.
For macarons, you should be using a 21″ sized piping bag. This gives lots of room for twisting the bag and control with your fingers to pipe the macarons effectively.
How do you fill a piping bag without making a mess?
Get a tall, wide glass and set it out with plenty of room around it.
Place the piping tip into the bag.
Twist the end of the tip and a few inches of bag and tuck it into the glass. This is to make sure the mixture does not go to the end of the tip yet.
Fold the edges of the bag over the glass.
Fill the piping bag.
Twist the piping bag to seal it closed.
Take the piping bag out of the glass and hold it sideways.
Cut the piping bag roughly in the middle of the metal tip so that the tips edges have no bag around it.
Pipe the first bit of batter out to get any air out.
Pipe your mixture.
Should frosting be cold before piping?
Frosting should be room temperature when piping. This will make it more malleable and able to be manipulated easier than if it was cold.
How do you get air bubbles out of a piping bag?
run your fingers up the sides of the bag where the air bubbles are
twist the bag until almost closed
run your fingers up the sides again to remove the air bubbles
pipe the first couple centimetres of your mixture onto a plate to make sure all the air bubbles have been removed
How do you seal a piping bag?
Twist the top of the piping bag to seal the piping bag.
Can you use a piping bag with store bought frosting
Yes. You can use a piping bag with store bought frosting. Store bought frosting is usually quite dense and thick, so pick a piping bag that is strong and durable enough that won’t break.
rough exterior for easy gripping and piping – no-slip material
smooth inner surface for icing to glide out of
environmentally friendly
use warm or cold mixtures in them
They are not dishwasher safe. You have to clean them by hand, which can be quite time consuming.
What can you use instead of a piping bag
Instead of a piping bag, you can use a resealable plastic bag for piping. Cut the tip of the bag small-large hole depending on how thick you want your icing to come out. Sometimes resealable bags are more difficult to keep closed and the icing can spill out the top of them.
How do you use a piping bag with a ziplock bag
Place ziplock bag at an angle in a glass.
Fold the edges of the bag over the glass
Fill the ziplock bag with your mixture to pipe.
Close the ziplock bag, make sure to try to get all of the air out of it.
Take the bag out of the glass and hold it horizontally.
Cut the tip small – large depending on how thick you want the icing to come out.
The batter is very thick, and there is a ton of batter. You don’t want to over-mix the batter when you are placing it into the bag.
Placing the macaron batter into the bag only once will give it the best chance of turning out. You don’t want to be refilling the bag as this may cause the macarons not to turn out from over-mixing.
How to Pipe Macarons
Get a tall, wide glass and set it out with plenty of room around it.
Place a 1/2″ piping tip into the bag.
Twist the end of the tip and a few inches of bag and tuck it into the glass. This is to make sure the mixture does not go to the end of the tip yet.
Fold the edges of the bag over the glass.
Fill the piping bag with macaron batter.
Twist the piping bag to seal it closed.
Take the piping bag out of the glass and hold it sideways.
Cut the piping bag roughly in the middle of the metal tip so that the tips edges have no bag around it.
Pipe the first bit of batter out to get any air out.
Pipe the macarons onto a 1.5″ template. Pipe the macarons by holding the top of the bag and squeezing the batter with your fingers that are holding the seal at the top of the bag. Pipe holding the bag straight up. When you’re wanting to move on to the next macaron, make a U to smear the tip on the top of the macaron. This will create less peaks and valleys for you to bang out later. Leave a few inches before piping the next macaron. Add any sprinkles or cookie crumbs. Then, let them sit for 30 min before baking.
Smoked vegan carrot lox is the long lost breakfast option for people that want to add more veggies to their routine.
If you struggle with the idea of eating oatmeal every day, or chugging a vegetable-filled smoothie each morning, you have to try this vegan cream cheese recipe out!
Ally of Cashew & Cheese creates her own vegan recipes from scratch.
From slow roasting carrots to taste like salmon, to vegan portobello mushrooms tasting like steak, she has some of the most unique vegan recipes on her blog. Her Greek heritage comes through in her recipes making them incredibly flavorful and decadent. Today she’s going to teach us how to slow roast vegan smoked carrots to taste like smoked salmon.
nori komi furikake recipe
Smoked vegan carrot lox satisfies your savory cravings while still feeling light and healthy.
This meal works incredibly for meal prep. Smoke your vegan carrot lox on Sunday and enjoy them all week long.
6whole wheat English muffinsor bread of your choice
Instructions
Preheat oven to 350 F.
In a bowl, toss the peeled carrots with rice vinegar, liquid smoke (2-3 dashes), kelp granules (nori komi furikake), caper liquid, salt and pepper (white pepper works well). As long as it smells fragrant and a faint bit like seafood, you are good to go!
Wrap your seasoned carrots in tin foil packets.
Slow roast your smoked vegan carrots by cooking them in your oven for about 3 hours, flipping the tin foil packets every 45 minutes.
Remove from the oven at the 3 hour mark. Check them and adjust flavor/cook time to your own preference.
Once you're happy with your smoked vegan carrots mixture, let them cool to room temperature.
Toast English muffins. Assemble smoked vegan carrot lox by adding vegan cream cheese, fresh dill, smoked vegan carrots lox, red onions, and topping with capers. Serve immediately.
Store excess smoked vegan carrot lox in an airtight container in the fridge.
Place flour, baking powder/baking soda, salt, sugar into your recipe. Mix well.
Add butter/shortening.
Cut the butter using your pastry blender. When you cut the butter move your wrist to make a ¼ turn at the end to mix it into your flour.
Cut your butter with your pastry blender until the butter looks about ½ cm pieces aka coarse crumbs. The butter will all be covered in your flour mixture.
what coarse crumbs looks like after using a pastry blender
How do you cut butter in a recipe?
Make sure your butter is cold, right out of the refrigerator.
Cut your butter into your flour mixture by pressing your pastry blender into the butter, cutting right through to the bottom of the butter. If it’s too hard, just try cutting smaller pieces off of the top until it’s a bit easier to work with.
Once it’s a bit more worked in, cut your pastry blender into your flour with a ¼ turn at the end to completely mix it into your flour mixture.
Cut all of the butter with your pastry blender until your butter is in small pieces ~½ cm.
How do you clean a pastry blender?
Rinse the pastry blender with a bit of water, or soak in some soap and water. Once the majority of your butter/flour is off of the pastry blender, place it on the top rack of your dishwasher to fully clean it.
Is a pastry blender necessary?
Yes. Using a pastry blender is one of the hand tools recommended for making pastry. Making pastry is already difficult enough, especially without the right tools.
Basil can be used at the end of the cooking process. It will wilt and the flavor deteriorates as it gets heated; therefore, adding it at the end will give your dish the most flavor possible.
How to Cook Basil Leaves?
It depends what you’re making. If you’re including it in a pasta dish, you can cut it into strips, then add them in at the end. When you’re making pesto and Vietnamese wraps, use the whole leaf.
Can you eat a basil leaf raw?
Yes. Basil can be consumed raw on appetizers like crostinis and bruschetta.
Yes. Just like all produce you bring home from the grocery store, you should wash it thoroughly and dry before using.
What is Basil best used for?
Basil is best used for making pesto, pizza sauce, and margherita pizza.
What does Basil go with?
Basil goes best with tomatoes, olive oil, mozzarella cheese. Frequently it’s used in Italian cooking which will give you a good clue as to what it goes well with.
Root Parsley: vegetable addition to soup, stew or eaten as is.
How to Grow Parsley from Cuttings?
Cut a stem of Parsley approximately 3 inches tall that has leaves attached to it.
Put it in water in a window sill that gets a lot of sun.
Once the roots have grown after a couple of weeks, place into well drained soil and continue growing.
How to Grow Parsley Outdoors?
If you have a new plant from a nursery you have a couple of options- if it’s still cold outside at night, start growing inside on a sunny windowsill. Place outside after the last frost.
Parsley likes it’s soil damp, be sure to continue watering throughout the summer
Plant seeds 6-8 inches apart so they aren’t too crowded.
Plant seeds outside covering them only by 1 cm of soil. Give them a bit of room to grow, not too much is needed.
Parsley Growing Conditions
Wet soil
A bit of sunlight
Try to not clutter the plant – thin it out so it will continue to grow
How do you cut parsley to encourage growth?
Cut clippings from the outside to encourage new growth in the middle of the plant
Cut any flowers that begin forming to extend the life of your herb
How to Preserve Parsley in Fridge?
Place stems of freshly cut Parsley into a glass of water
Store the glass full of Parsley in the fridge to extend the life and flavor of the herb
Change the water as needed
How to Eat Parsley?
Use the leaves only when eating Parsley. The stems are very bitter and won’t have that sweeter flavor the leaves do.
Have too much Parsley, and you’re not sure what to do?
Dry your Parsley so you can use it all year round.
How to dry Parsley?
Cut stems of Parsley from the outer edge of the plant
Tie the stems together
Place Parsley in a paper bag
Poke a couple of holes in the bag to aerate them.
Store the bag in a cool, dry area for a couple of weeks.
After 2 weeks, take your Parsley and grind them up with your fingers. You should have a nice medium grind – perfect for adding to dishes
Store in an airtight container for ~ 1 year.
By using the paper bag method, you’ll keep the strong green color and flavor as much as possible.
Parsley is a light, fresh herb that adds character to dishes like eggs, meat, dips and potatoes. Try growing it for yourself next summer and see how you like cooking with your freshly grown herb.
Oregano can be used in cooking to add a bitter, earthy, pungent flavor. Oregano can be used to balance out other strong flavors like onions, garlic, thyme, and lemon.
How to use Oregano Leaves
Fresh leaves can be used in place of dried Oregano. Fresh Oregano is stronger than dried Oregano, so taste test before adding too much
Dried leaves need to be crumpled in your fingers first, then added to your dish
What is Oregano Good for in Cooking
Oregano is best known for being used throughout many mediterranean dishes including Greek salad, pizza sauce, and pasta sauce
marinades/rubs for chicken, beef and fish
Including in roasted potatoes, carrots, butternut squash, red onions
Add to pizza dough for extra flavor
Topping for breadsticks
Oregano pesto
Greek Salad
Infused oil for dipping sauce or focaccia bread
Herbed butter
Brown butter sauce addition
Olive oil pasta addition
Stuffing
How do you Preserve Fresh Oregano Leaves
Freeze oregano leaves right before the plant flowers. These will be the most flavorful plant leaves.
Store frozen leaves in an airtight container.
Thaw leaves for 10 min before using.
Crumple leaves in your fingers, then add them to your dish to ignite the flavor.
How to Dry Fresh Oregano
Clip oregano stocks right before it flowers
Tie stocks together at the bottom
Hang Oregano upside down
Let dry for 3 days in the sun/or ~7 days inside (place a paper bag underneath so it will gather any droppings if you’re drying Oregano inside.
After Oregano is finished drying, get a bowl to harvest your Oregano in.
Place the bowl outside so you don’t get a mess everywhere inside.
Run your fingers down the stock gathering the leaves into the bowl.
Multiple stocks can be done at a time.
If you want a finer Oregano – use your fingers to grind the Oregano up into a smaller herb.
Store in an airtight container.
How to Grow Oregano Indoors
Plant seeds/new plant from a nursery in fresh soil and place in a container that is able to drain out the bottom
Place in a window that gets a lot of sun
Water only when the soil feels dry
Water until it starts draining out the bottom of the container
Grow the plant at least 4 inches tall before trimming the plant
Continue to clip the plant periodically to encourage new growth
Perennial – self seeding plant
Drought tolerant
Oregano Plant Types
Mild Oregano – Golden
Strong, pungent Oregano – Greek
Spicy Oregano – Syrian
Common Oregano – marjoram hybrid- Italian
Common Oregano
Marjoram is from the Oregano family. Marjoram is commonly used in Northern Italy instead of Oregano. It’s a bit sweeter, lighter flavor than common Oregano. It’s not as harsh or bitter as common Oregano. It’s usually only used at the end of cooking, because cooking Marjoram can kill off the flavor of the herb. Oregano is much more heat resistant. You can use Oregano early on in the cooking process without losing it’s pungent, bitter flavor.
The pressure is set at 12 bars when it is shipped to you. But sometimes it does only brew as a 9 bar, depending on pressure and how much water is flowing.
It brews as one of the best 9 bar coffee machine with a little practice. See our espresso troubleshooting guide if you need help.
Why is the Rancilio Silvia the best 9 bar coffee machine
hazel to dark brown foam (see video of Rancilio Silvia brewing espresso below)
smooth texture
floral aroma mixed with toasted bread/chocolate notes as it brews
The Rancilio Silvia is only manufactured in Italy. They test every machine to make sure it’s working perfectly before they send them out. It might even come with a few granules of coffee on it when you get it.
The compartments are made so that any part can be replaced or fixed if needed.
They want you to have this machine for a long time, it’s built to last.
You can expect to have this 9 bar coffee maker for over a decade.
When the coffee starts tasting not as good as it usually does, you should clean the screen. The screen will get built up with coffee over time, use a bit of cleaning detergent and a toothbrush to make it shiny and new. This will give you the aromatic flavor from your Italian coffee maker that you love!
I purchased my own Rancilio Silvia in November 2012 and I absolutely love it. I had never owned a coffee maker before this so it was a steep learning curve. Watching videos and practicing daily made me be able to improve my skills and pull delicious crema for my morning coffee.
What’s the difference between 15 bar and 9 bar espresso
The best extraction for espresso is between 8-10 bars. This is dependent on your espresso machine, type of espresso beans, grind, water temperature and tamping pressure. Fine tune what works best for you, but 9 bar espresso is the Italian standard and won’t make too much of a difference at 15 bar.
We use cookies to ensure that we give you the best experience on our website. If you continue to use this site we will assume that you are happy with it.


 Recipe by Alexandra Thompson of Cashew & Cheese


