Jenna is a self taught, home cook with a passion for baking. She gets her culinary inspiration by travelling abroad, and learning new culinary techniques.
Nordic Ware’s natural aluminum baking pan has very high edges, which makes grabbing the pan out of the oven much easier.
The baking pan is designed that silicone baking mat’s will fit perfectly inside the edges of the baking pan. There is no part of the baking pan that isn’t covered by silicone, therefore you can pipe the maximum number of macarons onto the baking sheet.
For a half sheet, you can fit 40 macarons shells piped onto the baking sheet. This will create 20 filled macarons.
Typically 1 batch of macarons makes 40 filled macarons, therefore it’s best to have 2 half baking sheets.
Piped macarons need to be on a baking sheet, and a silicone baking mat or parchment paper.
The air bubbles need to be removed from the macarons before baking, this is usually done by banging the bottom of the baking pan. Another option is dropping the baking pan onto a flat surface to remove the air bubbles.
Nordic Ware’s natural aluminum baking pan is very strong, you’ll have no problem banging the bottom of the pan to remove the air bubbles from the macarons before baking.
Why is aluminum the best material for baking macarons
Aluminum is the best metal at conducting heat over other baking sheets like stainless steel.
Stainless steel baking pans can create hot spots and will not bake macarons evenly.
Older stainless steel pans can make macarons have sticky bottom shells, and will come out of the oven undercooked.
Aluminum baking sheets resist warping, and are extremely sturdy and durable.
Aluminum baking pans conduct heat evenly throughout the pan.
Aluminum is a light colored baking sheet; it doesn’t absorb heat like other metals, such as stainless steel.
With a lighter colored pan, you can bake your macarons for a shorter amount of time than if you used a stainless steel baking sheet.
Aluminum baking sheets are the choice of high grade commercial bakeries around the globe.
How to clean aluminum baking sheets used for macarons
To clean your aluminum baking sheets, soak them with soap and water and wash with a cloth until clean.
Allow the pan to air dry completely before storage.
Do not wash aluminum baking sheets in the dishwasher as this can cause them to oxidize and break down.
Macarons need their aluminum pans to be perfectly clean. There can be no oily residue present on the baking pan. If there is, the macarons will absorb the oil and will not turn out. The macarons will be sticky and under-baked, or will not turn out at all.
If you’re having trouble removing the oily residue from the aluminum baking pan, pour very hot water on the pan, and this should remove the oil from the baking pan.
There are countless ways to use silicone molds. Silicone molds are best used for foods that need to be solidified in the fridge or freezer. Silicone molds do not conduct heat well, and therefore should not be used in the oven. Learn how to use your silicone molds in 9 different ways to create stunning foods for your friends and family.
Hot chocolate bombs using silicone molds
Melt chocolate and coat the sides of a half sphere silicone mold using the back of the spoon. Repeat with a second half sphere mold.
Add 1 tbsp of cocoa powder to one of the chocolate shells, sprinkles, and marshmallows if desired.
Melt the edges of the other chocolate shell on a warm place and press it together to seal the hot chocolate bomb.
Top the hot chocolate bomb with a couple of strips of a different kind of chocolate and sprinkles to give it a beautiful finish.
Layered mousse cake using silicone molds
Make your mousse cake by using a recipe that has been stabilized with gelatin to create your mousse cake. Let the mousse chill for a couple of hours.
Select the inside of your mousse cake. Dark chocolate ganache or raspberry jam would go well as the center of your mousse cake.
Create your mousse cake bottom. It could be an cookie crumble mixed with butter to stabilize it, and then bake it. Another option is almond dacquoise. It’s a little bit harder than a cookie crumble and has more thickness to it.
Let it the bottom of the mousse cake cool to room temperature. Use a metal cookie cutter or a glass to gently cut the cookie into pieces that will fit perfectly for your silicone mold. Try to get it as exact as possible or a little smaller.
Assemble the mousse cake by spooning the mousse into the silicone mold. Leave about 1/4″ thickness from the top of your mold to add the cookie to the mold at the very end. Leave enough room for the center of your mousse cake.
Spoon the center into the silicone mold until it’s about level with the mousse.
Add the cookie and press it into the center and mousse a little. It’s ok to have the mousse come around the edges.
Freeze the mousse cake for about 4 hours to let it set.
Remove the mousse cake from the freezer and gently peel back the silicone mold.
You can add a mirror glaze to the top of your mousse cake, or a simple syrup to make it shine. You can dust the top with powdered sugar, cocoa powder, coconut flakes, or add a small amount of whip cream to the top to finish it off.
Your mousse cake is ready to be served.
Layered dome ice cream cake using silicone molds
Coat your exterior ice cream flavor in the half sphere silicone mold. Make sure the edges are completely covered right up the sides of the mold. Press the ice cream using the back of a spoon into the mold so it’s packed tight. Freeze for 30 minutes.
Add your second layer of ice cream, keeping in mind that you still need a center. Coat the edges of your exterior ice cream in your second layer. Typically it’s nice to have them the same side roughly. Press your spoon into the center of your ice cream layers to create enough room for your next layer. Freeze for 30 minutes.
Add the center to your ice cream dome cake. Add a complimenting flavor to your other ice creams you have selected. A couple of ideas for the center of your ice cream dome cake include: jam, chocolate ganache, lemon curd, or caramel sauce. Freeze for 4 hours until completely solid.
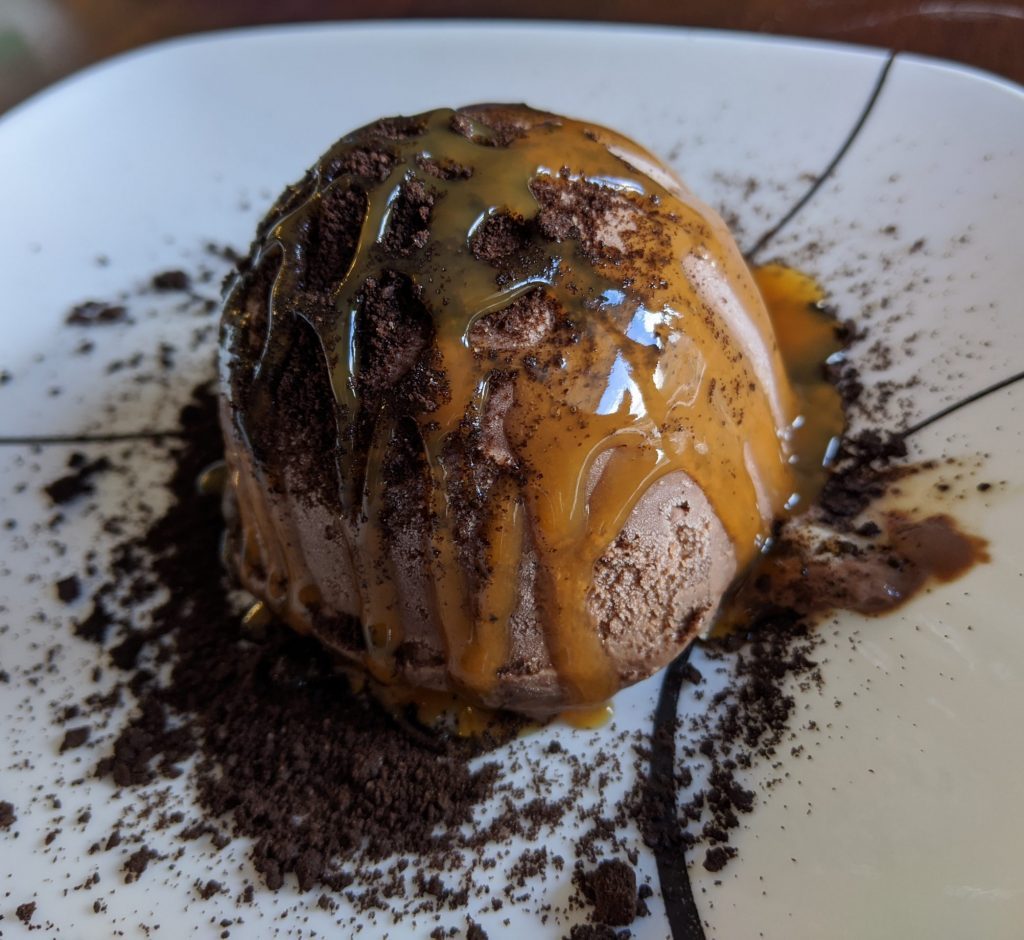
When you’re ready to serve your dessert, remove the ice cream dome cake from the silicone mold by peeling away the edges and pressing the top with your thumbs to release it.
Once you’ve placed your ice cream dome cake on a serving plate, you can add your final topping to it. A final topping for your ice cream dome cake could be: mirror glaze, caramel sauce, cookie crumbs, dusting of coffee, cocoa powder, or a combination of them. (If using mirror glaze, place the cake on a cooling rack and let the excess mirror glaze fall off before serving).
Tap silicone mold on counter a few times to remove air bubbles.
Place in the fridge until completely solidified ~1 hour depending on how large the chocolates are.
Remove the chocolate from the silicone mold.
Filled molded chocolates using silicone molds
Temper couverture chocolate
Pour chocolate into silicone molds until about halfway full.
Tip the mold until the chocolate has reached the edges of the mold.
Place the mold in the fridge for 20 minutes.
Fill the chocolate with your filling. You could use jam, hazelnut sauce, or a cream filling.
Pour more tempered chocolate onto the silicone mold.
Scrape excess chocolate using a pastry scraper.
Tap silicone mold on counter a few times to remove air bubbles.
Place in the fridge until completely solidified ~1 hour depending on how large the chocolates are.
Remove the chocolate from the silicone mold.
Gummy bears using silicone molds
Gummy bears can be made by creating a sugar syrup with gelatin, corn syrup and sorbitol. The mixture is dyed with food coloring, and then poured into bear shaped silicone molds. The gummy bears take 24 hours to fully solidify in the fridge.
Chocolate cups using silicone molds
Melt 1/3 cup of chocolate in the microwave using a microwave safe bowl. Melt in 30 second intervals and stir in between intervals until fully melted.
Obtain your clean and dry silicone molds you want to use to make chocolate cups with.
Use your spoon to dip into the chocolate and coat the sides of the silicone mold.
Use the back of the spoon to guide the chocolate up the silicone mold.
The trick to making chocolate cups with silicone molds is making sure the sides of the cup are quite thick. The thicker the sides, the less likely the sides are to breaking. If you do break the sides a little, you can always melt the edge on a plate to make a perfect circle around for your chocolate cup.
Place in the freezer for 1 hour until fully hardened.
To remove the chocolate cup from the silicone mold, pull the sides of the silicone mold until you have removed the edge of the chocolate all the way around the mold. Once the bottom edge is completely separated, press the top of the mold to release the chocolate cup from the silicone mold.
To make the edges nice and perfect, melt the edge on a warm plate.
Fill the chocolate cup and serve.
Vegan Coconut Milk Espresso Ice Cream
Peanut butter cups using silicone molds
Melt 1/3 cup of chocolate in the microwave using a microwave safe bowl. Melt in 30 second intervals and stir in between intervals until fully melted.
Obtain your clean and dry silicone molds you want to use to make chocolate cups with.
Use your spoon to dip into the chocolate and coat the sides of the silicone mold.
Use the back of the spoon to guide the chocolate up the silicone mold.
Place in the freezer for 1 hour until fully hardened.
Add a spoonful of peanut butter to the center of the peanut butter cup.
Melt 1/4 cup of chocolate and spoon it over the peanut butter.
Place in the freezer for 1 hour until solidified.
Remove the peanut butter cup from the silicone mold by pressing the top of the mold to release the peanut butter cup from the silicone mold.
Serve
Cheesecake using silicone molds
Bake the crust of your cheesecake using a baking pan. Fully cool the crust and use a cookie cutter or glass to cut the crust into the perfect shape for your silicone mold to sit on the top of it.
Make your cheesecake recipe using a no bake recipe. Pour it into the silicone molds.
Chill for 4 hours.
Add the crust to the cheesecake.
Gently remove the silicone mold from the cheesecake.
You can create a chocolate dome cake with silicone molds and have it shaped as a half sphere.
Chocolate mousse is stable when making it with gelatin. Use a chocolate mousse recipe that has been stabilized with gelatin to create your chocolate dome cake.
Begin by making your chocolate mousse and letting it chill for a couple of hours.
Select the inside of your chocolate dome cake. Dark chocolate ganache or raspberry jam would go well as the center of your cake.
You can make a cake bottom to go with your chocolate dome cake. Your cake bottom could be an cookie crumble mixed with butter to stabilize it. Another option is almond dacquoise. It’s a little bit harder than a cookie crumble and has more thickness to it.
Once you’ve baked the crust for your chocolate dome cake, let it cool to room temperature. Use a metal cookie cutter or a glass to gently cut the cookie into pieces that will fit perfectly for your silicone mold. Try to get it as exact as possible or a little smaller.
Assemble the chocolate dome by spooning the mousse into the silicone mold. You could use a half sphere silicone mold to give it a dome cake look.
Leave about 1/4″ thickness from the top of your mold to add the cookie to the mold at the very end.
Guide the mousse up the sides of the silicone mold leaving about 1/4″ thickness from the top. Make sure there’s a thick layer on the edges, and leave enough room for the center of your chocolate dome cake.
Spoon the center into the silicone mold until it’s about level with the mousse.
Add the cookie and press it into the center and mousse a little. It’s ok to have the mousse come around the edges.
Freeze the mousse cake for about 4 hours to let it set.
Remove the chocolate dome cake from the freezer and gently peel back the silicone mold.
You can add a mirror glaze to the top of your dome cake, or a simple syrup to make it shine. You can dust the top with powdered sugar, cocoa powder, coconut flakes, or add a small amount of whip cream to the top to finish it off.
Couverture chocolate is best used when chocolates using silicone molds.
Couverture chocolate is made with a larger percentage of cocoa butter (>30%) than regular compound chocolate.
Due to the bigger portion of cocoa butter, this gives a more rich flavor to the chocolate than regular chocolate.
Callebaut Belgian couverture chocolate is the best chocolate for silicone molds because it processed to a finer chocolate, making the smoothness of the chocolate much more luscious and rich.
Why do you need to temper chocolate for silicone molds
There are 5 different types of crystals that can form and allow the chocolate to have different properties.
If the melting temperature is too low, the chocolate will be crumbly and melt very easily. (Crystal type I)
If the melting temperature is too hot, the chocolate will be too hard. (Crystal type VI)
Chocolate that contains more cocoa butter will melt at a lower temperature.
Chocolate varies in their fat content, milk fat content, and shape of the fat molecules at a cellular level.
The best chocolate is made with Crystal type V.
Tempering chocolate for silicone molds involves breaking and reforming bonds of crystals.
When chocolate is in a solid brick form, the fat particles of the cocoa butter are in a crystalized hard form.
When the crystals are warmed, the cocoa butter at the molecular level breaks apart these hard bonds to create a liquid state.
Once the chocolate is allowed to cool, the bonds will form a more solid structure again.
Chocolate is tempered if it looks shiny and glossy.
Tempered chocolate should hold well at room temperature, and only begin melting at around 37 degrees Celsius.
Tempered chocolate should last up to a year, this is why it is preferred when making chocolate in silicone molds.
Milk Chocolate
Dark Chocolate
White Chocolate
Melting temperature
46 C
49 C
43 C
Cooling temperature
26 C
27 C
25 C
Reheat temperature
30 C
32 C
28 C
How to temper chocolate for silicone molds
Place chocolate over a double boiler. There should be a couple of inches of water in a large saucepan. Place a large metal bowl over the saucepan. The bottom of the bowl should not touch the water.
Heat the chocolate until the melting temperature has been reached. Use a digital thermometer to get an accurate reading.
Take the chocolate off of the heat.
Turn the heat off. Leave the saucepan with hot water on the burner.
Place the chocolate filled bowl in another bowl full of ice water. The chocolate should not touch the water at all. Cool the chocolate until the cooling temperature has been reached.
Put the chocolate bowl in the saucepan again and reheat until the reheating temperature has been reached.
Your chocolate is ready to for your silicone molds.
Pour the chocolate over the molds until they are completely filled and overflowing.
Tap the silicone mold to remove any air bubbles.
Scrape the excess chocolate off of the mold by using a bench scraper. You can reuse this chocolate again, just scrape it onto some parchment paper.
Place the molded chocolate into the fridge for 20 min.
You can use normal chocolate for silicone molds if you don’t have chocolate for tempering. The difference will be that your chocolate will not have the shiny, glossy look to them. The chocolates will be much harder to bite into.
Silicone molds are best used in the fridge or freezer to create delicious treats. Silicone does not conduct heat, and is therefore difficult to use in the oven. Therefore, we recommend using it in the fridge or freezer instead.
You can use silicone molds in a number of different ways including making layered mousse cakes, hot chocolate bombs, and ice cream dome cakes.
Can silicone molds be used in the oven
Yes, you can use silicone molds in the oven safely. Silicone molds are very heat resistant, but always check the packaging to confirm the highest temperature you can use them at.
Does it take longer to bake in silicone
It does take longer to bake in silicone than with metal pans. Silicone does not conduct heat well, therefore it takes a lot longer to bake with silicone.
Darker molds can take longer to bake than lighter molds as well.
Always check cakes for doneness using a toothpick.
Do you put silicone bakeware directly on the oven rack
No, do not put silicone bakeware directly on the oven rack.
Use a cookie sheet underneath the silicone baking mold to stabilize it. It will be much easier putting it in and out of the oven with a cookie sheet under the silicone mold.
Is silicone bakeware better than metal
Silicone bakeware is not better than metal when baking in the oven. Silicone bakeware does not conduct heat. Aluminum baking pans are the best to use in the oven.
Do you need to spray silicone candy molds
You do not need to spray silicone candy molds.
Pop the candy out of the silicone mold by using your fingers to push it out.
If you use a spray when using your silicone mold, you could have a greasy sheen to them, which isn’t ideal when making candy.
When baking with silicone molds, what is the highest and lowest temperature you can use them at
The highest temperature you can have silicone molds at in the oven is 200°C without damaging them. They can withstand higher temperatures, but they will start breaking down if held at temperatures higher than 250°C.
The lowest temperature silicone molds can handle is -60°C without breaking down.
Check your package insert for exact temperature abilities of your specific silicone molds before using at extreme temperatures.
What are the advantages of silicone bakeware
Dishwasher safe
Freezer safe
Microwave safe
Oven safe
How do you clean silicone bakeware
Use soap and water. Do not soak for extended periods of time.
Wash quickly with soap and water or place in the top rack of the dishwasher to clean. Do not use abrasive cleaners on silicone.
How to use silicone molds for a layered mousse cake
You can create a layered mousse cake with silicone molds and have it shaped as a half sphere.
Mousse is fairly stable when making it with gelatin. Only use mousse that has been stabilized with gelatin to create your layered mousse cake.
Begin by making your mousse and letting it chill for a couple of hours.
Select the interior of your layered mousse cake. You can put chocolate ganache, lemon curd, raspberry jam, ice cream, etc. The possibilities are endless.
You can also opt for a cake bottom to go with your layered mousse cake. Your cake bottom could be an cookie crumble mixed with butter to stabilize it. Another option is almond dacquoise. It’s a little bit harder than a cookie crumble and has more thickness to it.
Once you’ve baked the crust for your layered mousse cake, let it cool to room temperature. Use a metal cookie cutter or a glass to gently cut the cookie into pieces that will fit perfectly for your silicone mold. Try to get it as exact as possible or a little smaller.
Assemble the layered mousse by spooning the mousse into the silicone mold. You could use a half sphere silicone mold to give it a dome cake look.
Leave about 1/4″ thickness from the top of your mold to add the cookie to the mold at the very end.
Guide the mousse up the sides of the silicone mold leaving about 1/4″ thickness from the top. Make sure there’s a thick layer on the edges, and leave enough room for the center of your layered mousse cake.
Spoon the center into the silicone mold until it’s about level with the mousse.
Add the cookie and press it into the center and mousse a little. It’s ok to have the mousse come around the edges.
Freeze the mousse cake for about 4 hours to let it set.
Remove the layered mousse cake from the freezer and gently peel back the silicone mold.
You can add a mirror glaze to the top of your dome cake, or a simple syrup to make it shine. You can dust the top with powdered sugar, cocoa powder, coconut flakes, or add a small amount of whip cream to the top to finish it off.
Your layered mousse cake is ready to be served.
How to use silicone molds to make hot chocolate bombs
Melt 1/3 cup of chocolate in the microwave in 30 second intervals. Mix in between each interval until the chocolate is smooth.
Using the back of a spoon, coat the silicone mold with chocolate. Only fill the chocolate up to a maximum of 3/4 of the way up the silicone mold. This will make it easier to remove later. Make sure you fill 2 semi-circle silicone molds for 1 hot cocoa bomb.
Gently pull the silicone mold away from the chocolate on the edges. Go around the whole circle gently removing the edges of the chocolate from the silicone mold.
Put the silicone mold upside down. Gently press the top of the silicone mold to release the chocolate from the mold. Be patient, and don’t be too aggressive when removing the chocolate from the silicone mold.
Place the semi-circle chocolates on a warm plate to melt the edges of the chocolate. This will be to seal the hot chocolate bomb later.
Fill one half of the semi-circle with 1 tbsp of cocoa powder, sprinkles, and marshmallows.
Hold the filled semi-circle in one hand. Put the other semi-circle on top and gently press the 2 together to create a seal.
Top the hot chocolate bomb with any other types of chocolate, sprinkles, gold dust, etc.
To use the hot chocolate bomb, place it in a mug and pour warm milk into the cup. Let it sit for a minute until the chocolate melts.
Stir the hot chocolate and it’s ready to enjoy.
How to use silicone molds for an ice cream dome cake
What you’ll need:
Exterior ice cream flavor
Interior ice cream flavor
Center (jam, chocolate ganache, lemon curd, caramel sauce)
Coat your exterior ice cream flavor in the half sphere silicone mold. Make sure the edges are completely covered right up the sides of the mold. Press the ice cream using the back of a spoon into the mold so it’s packed tight. Freeze for 30 minutes.
Add your second layer of ice cream, keeping in mind that you still need a center. Coat the edges of your exterior ice cream in your second layer. Typically it’s nice to have them the same side roughly. Press your spoon into the center of your ice cream layers to create enough room for your next layer. Freeze for 30 minutes.
Add the center to your ice cream dome cake. Add a complimenting flavor to your other ice creams you have selected. A couple of ideas for the center of your ice cream dome cake include: jam, chocolate ganache, lemon curd, or caramel sauce. Freeze for 4 hours until completely solid.
When you’re ready to serve your dessert, remove the ice cream dome cake from the silicone mold by peeling away the edges and pressing the top with your thumbs to release it.
Once you’ve placed your ice cream dome cake on a serving plate, you can add your final topping to it. A final topping for your ice cream dome cake could be: mirror glaze, caramel sauce, cookie crumbs, dusting of coffee, cocoa powder, or a combination of them. (If using mirror glaze, place the cake on a cooling rack and let the excess mirror glaze fall off before serving).
Gently tip the silicone mold to fill all of the sides of the chocolate to the edges.
Place the silicone mold in the freezer for 20 minutes.
Fill the silicone mold with your choice of filling. If you need an idea for filling your chocolates, try hazelnut sauce for your filling. Use a piping bag to pipe the small amount of filling in the center of the chocolates.
Add more tempered chocolate to the silicone mold. Using a pastry scraper, push the chocolate over the hazelnut sauce until they are all full.
Tap the silicone mold until all of the air bubbles are removed.
Place in the freezer for another 20 minutes.
Once the chocolate has completely solidified, you can gently remove the chocolate from the silicone mold.
Melt 1/4 cup of chocolate in the microwave using a microwave safe bowl. Melt in 30 second intervals and stir in between intervals until fully melted.
Obtain your clean and dry silicone molds you want to use to make ice wine chocolate cups with.
Use your spoon to dip into the chocolate and coat the sides of the silicone mold. If your spoon is too large, you can use a food safe paint brush to paint the chocolate onto the mold.
Use the back of the spoon or paint brush to guide the chocolate up the silicone mold.
Make sure the sides of the small chocolate cup are quite thick. The thicker the sides, the less likely the sides are going to break. If you do break the sides a little, you can always melt the edge on a plate to make a perfect circle around for your chocolate cup.
Place in the freezer for 1 hour until fully hardened.
To remove the chocolate cup from the silicone mold, pull the sides of the silicone mold until you have removed the edge of the chocolate all the way around the mold. Once the bottom edge is completely separated, press the top of the mold to release the chocolate cup from the silicone mold.
To make the edges nice and perfect, melt the edge on a warm plate.
Fill the chocolate cup with ice wine and serve.
Chocolate ice wine cups are a delicious treat to serve after dinner. Chill the wine, and let the chocolate cup sit at room temperature. When you’re ready to serve them, pour the ice wine into the chocolate cups and enjoy!
You can use large or medium silicone molds to make chocolate cups for desserts. You can easily make chocolate cups without balloons or paper cups. Silicone molds are reusable and very sturdy, they hold up well when making chocolate cups.
Melt 1/3 cup of chocolate in the microwave using a microwave safe bowl. Melt in 30 second intervals and stir in between intervals until fully melted.
Obtain your clean and dry silicone molds you want to use to make chocolate cups with.
Use your spoon to dip into the chocolate and coat the sides of the silicone mold.
Use the back of the spoon to guide the chocolate up the silicone mold.
The trick to making chocolate cups with silicone molds is making sure the sides of the cup are quite thick. The thicker the sides, the less likely the sides are to breaking. If you do break the sides a little, you can always melt the edge on a plate to make a perfect circle around for your chocolate cup.
Place in the freezer for 1 hour until fully hardened.
To remove the chocolate cup from the silicone mold, pull the sides of the silicone mold until you have removed the edge of the chocolate all the way around the mold. Once the bottom edge is completely separated, press the top of the mold to release the chocolate cup from the silicone mold.
To make the edges nice and perfect, melt the edge on a warm plate.
Fill the chocolate cup and serve.
How to use chocolate cups
You can use chocolate cups for many purposes including:
Silicone molds can be cleaned using soap and water. Rinse the mold with water and set it to dry. Do not use the mold if it has any residual water on it.
Almond flour needs to be sifted and very fine before using it for macarons. You can see how grainy the almond flour is before it’s been sifted.
You can see the difference in the texture of the almond flour after it has been sifted. The texture is much finer and lighter. Almond flour needs to be crumbly and easily be rubbed with your finger tips.
There is a difference in how fine your almond flour is depending on which one you’re using for your recipe. You can find almond flour that specifically indicates it’s superfine. It’s best to use an almond flour that is already fine to begin with. Then you don’t have to grind the almond flour any smaller using a food processor.
A colander can remove the large clumps that form in almond flour. You don’t need to use a fine mesh sieve in order to the the almond flour thin enough. A colander works well and is much faster than using a sifter.
Americolor has an array of gel paste colors that only use a tiny amount to give a batch of macarons a burst of color.
Strong color using a small amount of food coloring
Use only a toothpick amount of gel for every batch of macarons
bright and dark colors available
no separation of the color
color spreads evenly
squeeze bottle – ergonomic and economical
Americolor’s “student kit” comes with every color of the rainbow to get you started. It even comes with black just in case you want to make some cookies and crème macarons.
When you’re coloring macarons, you need to add more color than you think. As you add the meringue, the color will become lighter than the initial macaronage batter.
Typically you need to add the food coloring to your egg whites, then add your icing sugar and almond flour. Then you will add the meringue.
The meringue will dilute out the color since the batter will become larger.
Make sure to use more color and make it darker initially that you would like the macarons to have. It will take some practice to make sure you get the color you’re looking for.
You can even use the gel paste color to paint on macarons after they have finished baking. Emulsify the gel food coloring with a bit of almond extract and paint the food coloring onto the macarons.
Can you use regular food coloring in macarons
Macarons cannot use water based food coloring as the liquid will interfere with the consistency. Macarons have a very specific liquid to dry ingredient ratio. By adding liquid food coloring to the macaronage batter this will throw off the recipe and unfortunately, the macarons will not turn out.
How do you add food coloring to macarons
Use a toothpick to obtain a small amount of food coloring.
Add food coloring to your initial egg whites. Mix the color well until it fully emulsifies into the egg whites.
Add in your sifted and measured almond flour and icing sugar.
Mix together until combine. The consistency should be a paste at this point for macarons. Scrape the bottom of the bowl to incorporate all of the almond flour and make it a uniform color throughout the macaron mixture.
What can you add to macaron shells other than food coloring
tea
coffee
lavender
dried and crumpled roses
cookie crumbs
Adding a dusting of food decoration to the top of your macarons before they dry. Right after piping your macarons you can add a little of the above foods to your macarons and let them dry for 30 minutes before baking them. It will add a pop of color and flavor to your macarons.
Your macarons will stick to the silicone mat if they are undercooked.
Bake your macarons for 1-2 minutes longer than when using parchment paper for the macarons to be easily peeled from the silicone baking mat.
Macarons are not fully cooled
Macarons will stick to the silicone baking mat if haven’t fully cooled before trying to remove them. Let them cool for at least 20 minutes before trying to remove the macarons. Usually it’s easier to leave the macarons on the baking sheet and let the macarons cool on the silicone baking mat for at least 20 minutes. Then peel the macarons off of the silicone baking mat and fill them.
Silicone baking mat is oily
Silicone baking mats cannot have any oily residue, or particulate present on the baking mat when using them for macarons. The macarons will absorb the oil while baking, making the macarons very difficult to get off of the silicone baking mat.
To remove oily residue from the silicone baking mat, wash it with soap and water and rinse to let dry.
If the oily residue is still present, pour boiling water on the silicone baking mat and it will clean the baking mat perfectly to use for your macarons.
Baking pan is old
Macarons need fresh aluminum baking pans to cook well. If your baking pan is old, unfortunately the macarons will stick to silicone and even parchment paper. Macarons need the conductivity of aluminum to cook evenly and for the temperature to be evenly distributed while baking. Use a new aluminum baking pan for cooking macarons if your pans are quite well used.
Baking pan is oily
Macarons will absorb any oil that’s present on the baking pan through the silicone or parchment paper. Remove any oily residue from the pan by washing it with soap and water.
If the baking pan will not become clean after using soap and water, pour boiling water on the baking pan. The boiling water will clean the baking pan to remove any oil that is present and make it freshly clean to use for baking macarons on.
We use cookies to ensure that we give you the best experience on our website. If you continue to use this site we will assume that you are happy with it.