Mini Lemon Tarts with Pie Crust

Jump to Recipe

Mini lemon tarts have a buttery and flakey crust, and a citrusy lemon center filling.

Pie crust is an excellent substitute of tart crust because it’s buttery and flakey.

Tart crust is more like a shortbread cookie, it’s harder, and doesn’t melt in your mouth like pie crust does. We will be using Pâte Sucrée as our pie crust dough for our tarts.

What is Pâte Sucrée

Pâte Sucrée is sweet French pastry crust which is traditionally used for tarts.

Pâte Sucrée is a bit different than regular pie crust because you have to chill it once to let it rest before rolling, and then again after you have put your dough in your pan just before baking it.

Pâte Sucrée is much more stable as a tart crust because it’s less likely to shrink and become deformed as it bakes. It’s much more reliable and keeps it shape as best it can while baking.

The trick is to push the pastry into the pan to make it “enfoncer”. This means to push the dough into the sides of the pan as much as you can, and make the pastry as even as you can without getting it too thin.

How to make mini lemon tarts with pie crust

Fill your mini lemon tarts made with pie crust using lemon cream. Lemon cream is much more fuller, and less tart than using lemon curd. Lemon cream is made by making custard, and then adding cubes of butter at the end for that delicious lemon cream flavor.

Once the mini lemon tarts have been set, add a couple of raspberries on top. Face the raspberries to the base of the raspberry sits on the lemon cream, and the tip of the raspberry is facing upwards.

Add a touch of piped white chocolate ganache to the top of the tart over the raspberries. Keep your white chocolate ganache tart with raspberries in the fridge for up to 3 days.

mini lemon tarts with pie crust

How to make tart filling

Tart filling is made by making custard.

You can fill tarts with any type of custard you like. F

or our mini lemon tarts with raspberries and white chocolate ganache, we are making lemon cream.

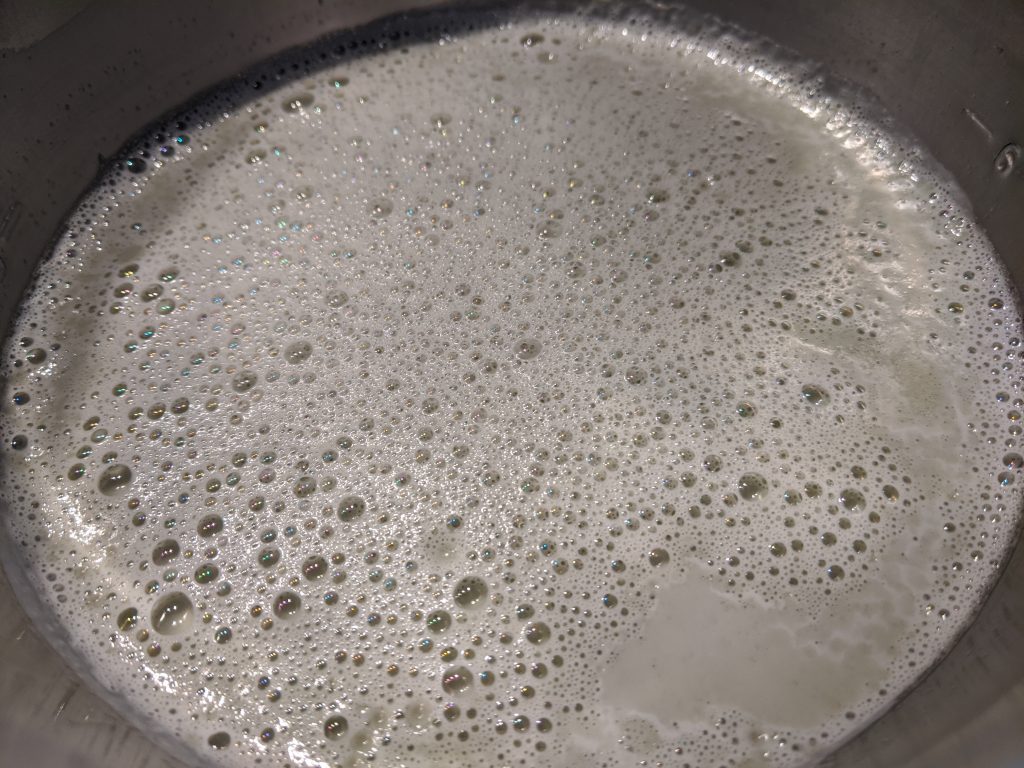
To make lemon cream, first prepare the lemon zest, sugar, lemon juice and whisk in the eggs.

Heat this over a double boiler until it’s thick frothy, continuously whisking the entire time to prevent the eggs from cooking.

Once it’s finished cooking, strain out the lemon zest and chill for a few hours before using this to fill your mini lemon tarts made with pie crust.

white chocolate ganache tart with raspberries

Learn how to fill your tarts with 23 types of tarts to make.

How to Assemble Mini Lemon Tarts with Pie Crust

  1. Make your white chocolate ganache. Store it in the fridge until you’re ready to use it.
  2. Make and bake your pie crust into mini tarts.
  3. Let them cool to room temperature. If you’re wanting the tarts to stay good for a few days, brush the crust with melted white chocolate and let the chocolate solidify.
  4. Make your lemon cream and pipe into the mini tarts.
  5. Chill for about 15-20 minutes.
  6. Add a couple of fresh raspberries on top of your mini lemon tarts.
  7. Pipe a little white chocolate ganache on top of the raspberries.
  8. Store your mini tarts in the fridge until you’re ready to serve them.

Pie Crust Tart Recipe

How to make a tart using a pie crust recipe
Prep Time20 minutes
Active Time3 hours
Total Time3 hours 20 minutes
Course: Dessert
Keyword: pie crust, tart
Yield: 2 8” tart shells

Materials

  • 1 1/2 cups all-purpose flour
  • 2/3 cup icing sugar
  • 1/3 cup almond flour
  • 1/4 tsp salt
  • 2/3 cup unsalted butter cubed, room temperature
  • 1 egg
  • 1/4 tsp vanilla extract

Instructions

  • Sift flour, icing sugar and almond flour. Measure out the required amounts into a stand mixer bowl. Add salt.
  • Using the paddle attachment for your stand mixer, add the butter and mix on low until the mixture becomes a bit grainy.
  • Add the egg and vanilla extract and continue mixing. Stop when the dough is just barely combined.
  • Finish the dough by combining the remaining dry ingredients left in the bowl on the counter with your hands. Make 2 dough balls and cover them in plastic wrap. Chill for 2-3 hours.
  • Roll out the dough on a floured surface until it's 1/4'' in thickness. Grease your 8'' tart pans with butter. Place your rollout dough on the tart pan. Press the dough into the tart pan to make sure its secure. Cut the excess dough using a sharp knife. Place the dough in the fridge for 15 min. Pierce the dough with a fork, not all of the way through the dough. Make several fork dents in the dough. Preheat your oven to 375 degrees F.
  • Bake your tart for 18 min. If you're making mini tarts, bake for 8-12 min. Remove and let cool. Brush the tart with melted white chocolate and let the chocolate solidify before filling your tart with the filling. This will prevent the tart shell from become soggy.

No Bake Lemon Tart Recipe

How to make lemon tart filling
Course: Dessert
Keyword: tart filling
Yield: 2 8” tarts

Materials

  • 3 tbsp lemon zest
  • 1 cup sugar granulated
  • 4 eggs
  • 3/4 cup fresh lemon juice
  • 1 1/4 cups unsalted butter cubed

Instructions

  • Place lemon zest and sugar in a bowl and rub the 2 together to release the lemon flavor. Whisk in your eggs and lemon juice.
  • Place mixture into a double boiler and cook on low. The mixture will become thick as you whisk it throughout the entire cooking process. Once it has thickened and becomes darker cook it for another 5 solid minutes. Whisk the mixture continuously.
  • Strain the lemon zest out of the lemon cream by using a strainer or colander. Push the cream mixture through the strainer using the back of a spoon or a spatula.
    how to make lemon tart filling
  • Whisk in cubed butter and mix until smooth.
  • Cover and chill for 3-4 hours in the fridge.
  • Remove the mixture from the fridge and mix it until it's softened up and smooth. Fill the tart shell with the lemon cream and chill it for 45 min. It's ready to serve, or store it in the fridge for up to 3 days.
    No Bake Lemon Tart Recipe

White Chocolate Ganache Filling Recipe

Step by step guide to making white chocolate ganache filling for macarons.
Prep Time1 minute
Active Time5 minutes
Chilling time1 hour
Total Time1 hour 6 minutes
Course: Dessert
Keyword: ganache, macaron filling
Yield: 60 macarons

Materials

  • 100 g heavy cream
  • 180 g white chocolate wafers

Instructions

  • Place heavy cream in a small saucepan on medium heat. Bring the heavy cream to a simmer, just before it starts to boil remove it from the heat source.
  • Measure your white chocolate wafers into a heat proof bowl.
  • Pour the hot cream over the white chocolate wafers.
  • Gently stir with a spatula until all of the white chocolate is melted and becomes a smooth mixture.
  • Let the white chocolate ganache sit until it's fully cooled to room temperature.
  • Place the white chocolate ganache into the fridge until it's chilled (1 hour).
  • Microwave the white chocolate ganache for your macarons in 10 second intervals until you've obtained the consistency you want for piping your macarons.

Lemon Tart Garnish Ideas

Lemon Tart Garnish Ideas

Lemon tart garnishes can range from dusted powdered sugar to cookie cutter pie toppings.

Lemon Tart Decoration Ideas:

  • candied lemon slices
  • dusted powdered sugar
  • white chocolate scrolls – made using a potato peeler against a bar of white chocolate
  • melted white chocolate, then put 2 diagonal lines next to one another, and another 2 diagonal lines intersecting about an inch from the edge of the lemon tart
  • trio of blueberries
  • trio of blackberries
  • raspberries in the center
  • kiwi slices

How to make pie crust decorations

Pie crust decorations are made using leftover pie dough. The pie dough is then cut using cookie cutters and made into pie crust decoration that can be arranged on the top of a cooked and cooled pie.

How to make pie art using cutouts

Pie art is easy to do with some leftover pastry dough from making your pie.

  1. Roll out your leftover pie crust. The thickness of your pie art dough should be ~1/4”
  2. Using cookie cutters, carefully cookie cut the pie dough into shapes you want to top your pie with.
  3. Bake the pie art when you’re cooking your pie. Usually cooking them for 5-8 min until they just begin turning color on the edges. Do not overbrown them or they will be overcooked.
  4. Once your pie has finished cooking and cooling, arrange the pie art on your pie.
  5. Serve!
How to make pie art using cutouts

Pie crust cut outs are so simple and yet so stunningly beautiful to change your pie from boring to beautiful! Try to make them a theme for your guests so it goes with the occasion. If you don’t have any themed cookie cutters, stars and hearts are a great combo to try out.

how to make pie crust decorations

How to make pie crust flowers

To make pie crust flowers you have a few options to choose from. Pie crust flowers can be made using cookie cutters. Once you’ve decided on your cookie cutters, you can use a narrow tool to add any more decorations to your pie cutouts. You can add stems, details, drawings on your pie cutouts before baking.

How to make rose pie crust flowers

Rose pie crust flowers are made using a circle cookie cutter. Then roll the dough up. Cut the dough in half in the middle. Stand the rose pie crust flower up on the flat side. Bake the rose pie crust flower with it standing up. It should just be starting to turn a light brown, and then it will be finished baking.

You can bake pie art for 5-8 min at 375 degrees F. These can be baked on an aluminum baking pan at the same time as your pie goes in the oven. Just make sure to watch your pie crust art very closely to make sure they don’t burn.

how to make pie crust decorations

Pie crust decorations will be a great decoration to add to a pie or a tart. You can use an egg wash (1 egg + 1 tbsp milk) and brush your pie crust decorations before they go into the oven for an added glistening effect for your pie crust decorations. You can also dust them with powdered sugar for a starry look to them. Get creative and start decorating your pie crusts the next time you’re having guests over for pie!

Eggless Puff Pastry Recipe

Jump to Recipe

Eggless puff pastry is made by laminating butter in between layers of dough to create a flakey and buttery pastry.

You can use puff pastry for baking desserts, appetizers, turnovers, and tarts.

Store unbaked eggless puff pastry dough in the fridge for 2 days, or freeze it for up to 6 months.

eggless puff pastry recipe

9 Eggless Puff Pastry Recipe Ideas:

  • danishes
  • tarts
  • chocolate braids
  • churros
  • turnovers
  • spinach and cheese puffs
  • cranberry brie bites
  • mushroom filled pastry bites
  • pulled pork pastry puffs

Eggless Puff Pastry Recipe

Step by Step guide to making homemade eggless puff pastry
Course: Dessert
Yield: 3 lbs

Materials

  • 4 cups all purpose flour
  • 2 tsp salt
  • 100 g butter cold
  • 1 1/4 cups water
  • 400 g butter cold
  • 1/2 cup flour

Instructions

  • Measure 4 cups of flour and 2 tsp salt in a large mixing bowl.
  • Cut in 100 g cold butter with a pastry blender until it resembles coarse crumbs.
  • Pour 1 1/4 cups water into a well in the center of the flour.
  • Mix and knead for a few minutes until the dough becomes smooth.
  • Chill dough for 30 min. Wrap in cling wrap.
  • Mix 400 g room temperature butter and 1/2 cup flour together. Shape into a 9" square by beating it with a rolling pin in between 2 cling wrap pieces on a cutting board. Chill in the fridge while you roll out the dough.
  • Roll the dough out to a 12" square. Place butter in a diamond shape on the dough.
  • Close the dough around the butter like an envelope and seal the edges so the butter is fully enclosed.
  • Use flour as needed to roll the dough into a rectangle shape until its ~ 1/4" thick. Fold the dough like a letter. Fold one side over the center. Then fold other other side over the center creating 3 layers of even size.
  • Roll out the dough into a rectangle again and repeat the letter folding process. Chill for 30 min.
  • Repeat this process until you have completed 6 folds, chilling for 30 min in between every 2 folds.
  • Your puff pastry is ready to be used.
    You can roll it out until it's about 1/4 " in thickness to use.
    You can cut the dough in half and freeze it if you're not going to use the whole thing.
    1/2 dough will roll out to 10" x 24".
    Pieces of puff pastry that are 10"x 9" should be baked for 18-25 min at 400 degrees F.
    Pieces that are 5"x5" can be baked for 15-20 min at 400 degrees F.
eggless puff pastry recipe ideas

Coconut Chocolate Mousse

How to make vegan chocolate mousse
Jump to Recipe

Coconut chocolate mousse is made with coconut milk which makes the chocolate mousse extra creamy and rich.

Be sure to use full fat coconut milk, not light.

You will need a stand mixer to whip the coconut milk as it does take awhile to whip.

No eggs are needed for this coconut chocolate mousse recipe! Egg free and dairy free chocolate mousse that tastes absolutely decadent!

You wont believe its vegan. It does look grainy and not a smooth color like full dairy and egg chocolate mousse. But, the texture is creamy and delicious! You will love it!

Try sifting the cocoa powder to make it light and fluffy. This will prevent the grainy bits in your mousse.

See video here.

Learn how to decorate mousse.

Coconut Chocolate Mousse

Coconut Chocolate Mousse

How to make vegan coconut chocolate mousse.
Prep Time20 minutes
Fridge time2 hours
Total Time2 hours 20 minutes
Course: Dessert
Keyword: chocolate, dessert, mousse
Yield: 5 servings

Equipment

  • fridge
  • Stand mixer

Materials

  • 2 cans coconut milk
  • 1/2 cup cocoa powder
  • 3/4 cup icing sugar
  • 1 tsp Vanilla extract
  • chocolate shavings optional

Instructions

  • Separate coconut cream and coconut water by pouring the water out of the can. You can use this water for a different recipe, we wont need this portion for our vegan chocolate mousse. Whip cream portion of coconut milk until fluffy – a few minutes on high with a stand mixer.
  • Add cocoa powder and icing sugar gradually until full combined. It will be a bit grainy.
  • Add the vanilla extract and mix together.
  • Place vegan chocolate mousse into serving cups. Refrigerate for at least 2 hours before serving.
  • Using a potato peeler, add chocolate shavings from a chocolate bar. This will create the scroll look for the topping on the mousse. (optional)

Notes

vegan chocolate mousse coconut milk recipe
Coconut Chocolate Mousse

Cookies and Cream Icing Recipe

Jump to Recipe

Cookies and creaming icing is full of delicious cookie crumble and has a hint of vanilla.

Cookies and cream icing is a buttercream icing that has crushed cookies throughout the icing.

You can use cookies and cream icing for icing cakes, as a macaron filling, or as a cupcake icing.

How to make cookies and cream icing

Cookie and cream icing can be broken down into only a few different components:

  • Butter for buttercream icing
  • Cookies: choose your favorite cookies for your icing. Some of my favorite cookies to use are Oreos, birthday cake Oreos, vanilla creme peek freans
  • Milk (alternatives include: half and half for a more rich flavor, oat milk & skim milk for a lighter flavor. The percentage of milk I usually choose is 2%. It’s a nice balance of flavors and creaminess
  • vanilla- you could get the vanilla flavor from the filling in the cookie, or vanilla bean paste or vanilla extract
  • Icing sugar
cookies and cream icing recipe
oreo macarons
cookies and cream macarons

Cookies and Cream Icing Recipe

How to make cookies and cream buttercream icing at home using a stand mixer
Prep Time10 minutes
Course: Dessert
Cuisine: American
Keyword: icing, macaron filling
Yield: 60 macarons
Author: Jenna Atkinson

Equipment

  • Stand mixer

Materials

  • 1/2 cup butter room temperature
  • 2 tbsp Oreo crumbs
  • 8 Oreo Cookies smashed into small pieces
  • 1 1/2 cups Icing sugar
  • 2 tbsp milk 2%
  • 4 tsp vanilla extract

Instructions

  • Begin by creaming the butter until it is fluffy, just a few minutes by a stand mixer.
  • Add your vanilla extract and cream together.
  • Add the milk and mix together. It should be a but liquidy and not fully come together yet.
  • Add Oreo crumbs.
  • Put Oreos into a ziploc bag. Place the bad on a wooden cutting board and then put the cutting board on a strong surface. You could put it on your kitchen counter or on your dining room table. Smash the cookies using a kitchen mallet or crush them up with the opposite end of a wooden spoon until they are all broken up into smaller pieces.
  • Remove the Oreos from the bag and put them in your stand mixer bowl. Mix together with butter mixture.
  • Start adding the icing sugar 1/2 cup at a time and beat it until it’s fully combined and a nice consistency. If you need the icing a bit more stiff add a bit more icing sugar. If you need the icing more runny, add a splash of milk.
  • Your icing is ready. For any leftovers, store in the fridge for 5-7 days. For anything longer, store in the freezer for up to one month.

Notes

oreo macarons

Vanilla Earl Grey Lavender Ice Cream

Jump to Recipe

Vanilla earl grey lavender ice cream is a creamy tea flavored ice cream with a hint of vanilla.

The ice cream base is made by tempering eggs to make it have a rich flavoring.

Earl grey is steeped into the milk while making the base of the ice cream to add the tea flavor.

Lavender is added to infuse the ice cream with a earthy lavender taste.

How to use lavender from the garden in baking

When your lavender is in full bloom and ready to harvest, cut the stems below the flowers. Dry your lavender by with laying them near a sunny window or tie them together and hang them upside down.

lavender buds

Culinary Lavender vs Garden Lavender

Do you need to use culinary lavender instead of lavender from the garden?

No you don’t need to use culinary lavender in your baking. You can use your fresh lavender from the garden.

lavender with stems

Why?

Culinary lavender gives off a sweet fragrance. Your lavender from the garden might not be as sweet, so it might not give you the perfect flavor you’re wanting. The more sweet the lavender, the more intense lavender flavor it will give you.

dried lavender

I don’t use the stems when I use lavender from my garden. The most sweet part of lavender are the flowers, so I just put the flowers/buds into my baking.

steeping lavender in cream

If you wanted to try out using lavender in different recipes you can try grinding up the lavender using a mortar and pestle. Then add it to some sugar to give you that rich sugar/lavender-perfect for your morning coffee with a hint of lavender!

lavender base for ice cream
Lavender ice cream ready to be chilled and churned

What can you bake with lavender flowers from the garden?

  • lavender ice cream
  • lavender cookies
  • lavender lemonade
  • lavender shortbread
  • lavender scones

Vanilla Earl Grey Lavender Ice Cream

How to make vanilla earl grey lavender ice cream using lavender from your own garden. Infuse earl grey tea into your vanilla ice cream mixture, then use your ice cream maker to churn it.
Prep Time15 minutes
Active Time45 minutes
Fridge/Freezer9 hours
Total Time10 hours
Course: Dessert
Keyword: ice cream
Yield: 10 scoops

Equipment

  • Ice Cream Maker

Materials

  • 2 cups heavy cream
  • 2 cups half and half
  • 1 tsp vanilla extract
  • 1/3 cup dried lavender
  • 1 tea bag earl grey tea
  • 4 egg yolks
  • 1/3 cup sugar
  • Purple gel food coloring optional

Instructions

  • In a medium saucepan (make sure it holds >1.5 liters) combine the heavy cream and half and half together. Add lavender to the saucepan without the stems. Bring to a gentle simmer for a couple of minutes over medium heat.
  • Remove your saucepan from the burner. Add earl grey tea bag to the pot and let steep for 4 minutes. Remove and discard the tea bag. 
  • In a large bowl whisk egg yolks and sugar together. Gradually temper the eggs by adding a bit of the hot cream mixture (couple of tablespoons at first) to the eggs and whisk vigorously to make sure not to cook the eggs.  Add all of the hot mixture to the bowl gradually until it’s all incorporated.
  • Pour the mixture back into the saucepan and bring to a gentle simmer over medium heat until the mixture thickens (couple of min).
  • Remove the saucepan from the burner. Use your large bowl from before and add your food colouring if desired. Place a mesh sieve on the bowl and pour your hot egg/cream mixture through the sieve. Whisk the food coloring until it’s combined. Add the vanilla extract. Let cool to room temperature/cold enough to put in the fridge. Refrigerate overnight. Freeze your ice cream bowl overnight as well.
  • Pour mixture into your ice cream machine and churn for 20-25 min.
  • Freeze for a few hours to let it harden up before serving.

Notes

lavender ice cream recipe

Happy Baking!

Coffee Ice Cream Recipe with Ice Cream Maker

Jump to Recipe

Coffee ice cream is a rich and creamy ice cream with a invigorating coffee flavor, with hints of vanilla undertones.

Coffee ice cream is made using a custard base, and then adding your favorite freshly brewed coffee or espresso to flavor the ice cream cream.

Coffee can be a very powerful flavor, therefore we’ll only be adding a couple of ounces of coffee to flavor the ice cream.

If you’re concerned about the flavor, only add 1 fluid ounce at a time, and taste test it. Only add as much as you need to.

If you over flavor the ice cream, you can add a little more vanilla extract to counter act the coffee flavor.

Alternatively, you can add a bit more whole milk to thin out the coffee flavor.

Coffee Ice Cream Recipe with Ice Cream Maker

What can you add to coffee ice cream

In the last 5 minutes of churning coffee ice cream, you can add:

  • mini chocolate chips
  • toffee bits
  • sprinkles
  • raisins
  • caramel sauce (marbled look)
  • gingerbread pieces
  • crushed cookies
  • chocolate sauce (marbled look)
  • mini peanut butter cups
Coffee Ice Cream Recipe with Ice Cream Maker

What can you serve coffee ice cream in

You can make your own chocolate cups to serve your coffee ice cream in for a special treat.

If you don’t have a silicone mold, you can use a cupcake liner and paint the inside of the liner with melted chocolate.

Place the cup in the fridge for a few hours, then remove the outer paper lining.

Serve your coffee ice cream in your delicious chocolate cup.

Coffee Ice Cream Recipe with Ice Cream Maker

How to make coffee ice cream using an ice cream maker.
Prep Time30 minutes
Active Time25 minutes
Fridge/Freezer time9 hours
Total Time9 hours 55 minutes
Course: Dessert
Keyword: ice cream
Yield: 10 people

Equipment

  • espresso maker
  • Ice Cream Maker
  • Saucepan
  • mesh sieve

Materials

  • 2 cups heavy cream
  • 1 cup whole milk
  • 1/2 cup sugar
  • 1/4 tsp salt
  • 5 egg yolks
  • 1/2 tsp vanilla extract
  • 4 shots freshly brewed espresso/strong coffee

Instructions

  • In a medium saucepan over low to medium heat add the heavy cream, whole milk, sugar and salt. Whisk to fully dissolve the sugar ~ 4 to 5 minutes.
  • In a large glass bowl place add the egg yolks and whisk the yolks together.
  • Slowly whisk 1 cup of the hot milk mixture into the egg yolks. You do not want to cook the eggs. Only add a couple of tablespoons at a time at the beginning and whisk vigorously to prevent the eggs from cooking. Continue whisking until 1 cup of the hot milk in mixed into the egg yolks.
  • Add the egg yolk mixture to the saucepan. Whisk until it comes to a simmer.
  • Remove the saucepan from the heat source and mix in the vanilla and espresso or hot coffee. 
  • Pour the mixture through a sieve and place in fridge until chilled (about 6 hours, but leave it overnight in the fridge to make it easy).
  • Add mixture to ice cream maker and churn for 20-25 min.
  • Freeze mixture for another 3 hours until fully chilled for ice cream and not just soft serve.

Notes

espresso brewing